Showing posts with label Bakery Club. Show all posts

Saturday, September 14, 2013

Scones for the Kiddos

I'M BACK! Man, I can't believe it's been since April that I have posted! My laptop, the gentle green girl (that I have had since the spring of 2007), finally crashed for the last time this summer. Actually, the cord literally broke off into the computer. No use trying to spend any money saving that bad boy.

The husband and I are both teachers, so we have iPads and nice school computers, so we didn't think it would be necessary to really have a home computer. Well, I didn't take into account that I would have to "check in" my school laptop for the summer, so no blogging for me for a few months. There are so many awesome recipes that I wish I could have shared (honestly, mainly for my own selfish reasons, because I ALWAYS forget the recipes which is why I started the blog in the first place). I thought that if I typed them up and posted them out on the blogosphere they could never be lost again. So far, it has worked-- with the minor exception of this summer.

The cover to my book :)
So, we are 1/2 way through the first quarter, and I can't believe how fast time is passing. I say this every year, but it is true every year. One of the many reasons why I love what I do is that time passes quickly. I am constantly moving, changing, adapting, and growing, and my students are doing the same. I get to do something completely different every day, and get paid to talk about all the geeky things I love. It doesn't get much better than that! I am still (5 years into it) at the point in my career where I firmly believe on each pay day, "I can't believe I just got paid for that!" Granted, a teacher does not a millionaire (or anywhere close to one) make. I don't need a million dollars though; I'm not even sure what I'd spend that kind of money on... well, I'm sure I could find SOME use for it if I had to... maybe copper cookware, an extra ( or larger) bathroom (we just have the ONE, tiny bathroom), a European adventure for the whole family, lactation support for all women that need it, etc. Who knows?? I digress...

sample student work
My model for the Literary Genre assessment
I had to bring my computer home this weekend to work on some lessons for my 7th grade Reading classes. I am totally revamping my curriculum this year for 7th grade, so I practically feel like a first year teacher again. All the LONG hours gathering supplies and creating my models have re-energized my teacher spirit. I had forgotten how much fun it was to create something new! This year I'm implementing Interactive Student Notebooks with my 7th Reading classes. The DAY before school started I was browsing Pinterest-- nothing new about that haha--, but this time I came across a brilliant idea, the ISN. I found the blog, Everybody is a Genius and became hooked. I had ONE day, but I knew I HAD to to this! I barely slept that first week of school. I bought resources from I'm Lovin Lit's Teachers Pay Teachers store (she has fantastic freebees, too!). The student examples are from the unit I purchased from her. I dove in, and I haven't looked back. It has been fantastic so far-- it keeps the students organized, and allows them to use their particular interests and learning styles to express their knowledge of the subject. I could go on and on about how much I love this notebook, but I'll save that for another blog post.
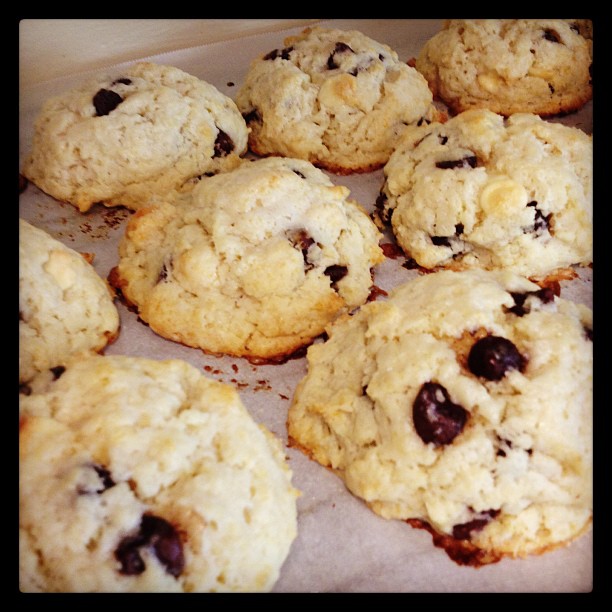
So, the scones already, right?! Well, about two weeks ago doodle bug started school and subsequently had her first cold ever (how did we make it 2 years??), and ended up with an ear infection... only took 1 day at preschool to get sick. I had to leave work early to take her back to the doctor yesterday to make sure she was all healed up and ready to fly next weekend. I can imagine that an ear infection and planes do not mix well. She was all clear, and according to my sub (who also happens to be my lovely mother), my homeroom students were "angels." I told them before I left that if they were 100% perfect for my mother (whom would never lie to me), then I would make them breakfast for Monday. That was all it took-- the promise of a baked good. So, scones it is. I had actually never attempted scones before, but was excited to finally give it a proper shot.

I found an amazing recipe on Food Network's website. Tyler Florence's Blueberry Scones Recipe looked too delicious to pass up. I pretty much followed his directions and recipe. I did not make the glaze (it looks delicious, but would be too messy for the classroom), but instead added lemon zest to the dough. I also used the same base recipe but swapped the blueberries for chocolate chips for the second batch. I needed about 24 scones.


Blueberry Scones
Ingredients:


  • 2 cups all purpose flour
  • 1 TBSP baking powder
  • 1/2 tsp salt
  • 2 TBSP sugar
  • 5 TBSP unsalted cold unsalted butter (I grated this because I did not have a pastry tool to help me incorporate it into the dough)
  • 1 cup blueberries (I used frozen)
  • lemon zest to taste
  • 1 cup heavy whipping cream (plus more for brushing on top)
Directions: 
  1. Preheat oven to 400
  2. sift together dry ingredients: flour, salt, baking powder, and sugar
  3. Using a fork (or pasty tool), cut in butter. I grated my butter first. The butter coats the flour and the mixture should look like course crumbs. 
  4. fold in blueberries and lemon zest-- be careful not to smash! I may have squished one in the process ;)
  5. Make a well in the center of the mixture and pour in cream. 
  6. Fold everything in just to incorporate-- do NOT over mix! 
  7. Line baking sheet with parchment, and use large scoop to distribute mixture. 
  8. Brush with cream and sprinkle with sugar
  9. Bake for 15 or so minutes (until lightly brown)
They came out SO delicious!

For the chocolate scones I followed the same recipe-- I just used 1 cup chocolate chips in place of blueberries. I did a mixture of white, milk, dark, and semi-sweet chocolate chips. 

I will use this recipe again and again! I hope you like it, too! Happy Baking :)

Monday, October 8, 2012

Lovin' From the Oven's S'mores Cookie Bars

I checked planners again this week for Bakery Club and 4 of my 26 students qualified. Many students forgot to write down ALL their tests and quizzes for the week which is why BC's numbers are down this go 'round.

I asked the kids what they wanted this time (usually they are quite direct), but this time they were a bit more adventurous. I think that this is due to that fact that I made a combo brownie/cookie last time that they LOVED! I told them I had been scouring Pintrest for something yummy and "different" for them to try. They were excited to hear all of my choices, and finally settled on S'mores Cookie Bars.

This recipe comes from Lovin' from the Oven. The kids practically drooled when they heard this choice. So, Lovin' from the Oven, I'll have you know that your recipes aren't just yummy looking, but 6th Grade approved as well. Let me tell ya-- it takes A LOT to impress these guys ;)

I followed her recipe almost exactly... I will include a few tips and tricks that I used as well.

Give these a go-- they are super easy and yummy!

Ingredients:
  • 1/2 cup unsalted butter room temperature (I'm a stickler for springing for "real and good" butter)
  • 1/4 cup packed light brown sugar
  • 1/2 cup white sugar
  • 1 large egg
  • 1 teaspoon vanilla extract
  • 1 1/3 cup all purpose flour
  • 3/4 cups graham cracker crumbs (you can make your own using a food processor, or you can buy the box of graham cracker crumbs in the baking aisle for about $1-$2 less)
  • 1 teaspoon baking powder
  • 1/4 teaspoon salt
  • pinch of all spice (just because I love it!)
  • 2 king size Hershey's chocolate bars
  • 1 1/2 cup marshmallow fluff
Directions:


  1. Butter and lightly flour 8x8 pan and set aside. Preheat oven to 350.
  2. In a stand mixer fitted with the paddle attachment, cream butter, sugar, and brown sugar until light.
  3. Add egg and vanilla and continue to beat until all ingredients are incorporated. 
  4. In a large mixing bowl, whisk together flour, graham cracker crumbs, baking powder, salt, and all spice.
  5. Slowly add dry ingredients to wet ingredient, mixing until incorporated. (I use one of Doodle Bug's small plastic cups as a scoop-- easier to measure out dry ingredients when adding to wet)
  6. Split dough in half-- put 1/2 of dough in refrigerator while layering the bars. This will help the dough slightly cool and will make it easier to spread for the top layer. 
  7.  Spread 1/2 of dough into the greased 8x8 pan. 
  8. Place chocolate bars on top of the cookie dough. I had to trim one of the chocolate bars about 1/4-1/2 inch in order for them to both fit. You want a single layer-- and this layer should be no more and 1/4 inch thick.
  9. Spread marshmallow fluff on top of chocolate bars in a thin and even layer. 
  10. Lightly flour your clean kitchen counter top and take chilled dough out of refrigerator. Use floured rolling pin to help spread out cookie dough. Take pieces of dough and add them (like patchwork) to the top of the marshmallow cream. After all pieces are added you can easily and lightly press down on dough to flatten and make even. 
  11. Bake for 30 minutes until edges are slightly brown.
  12. Let cool completely before cutting. For easier cutting-- I put the cooled dish in the refrigerator for a few minutes to let the cookie bars firm up a bit! These are Ooey Gooey!!
Yield: 16 cookie bars
The finished product! Too  gooey for treat bags!

Sunday, September 23, 2012

Chewy Brownie Cookies

Bakery Club students were in a deadlock on Friday... cookies or brownies? 

At first I thought I would make a cookie cake, but then I realized... what would a cookie cake have to offer to the students wanting brownies? Okay, scratch cookie cake idea...what about brownie bites? Not quite the sweet treat the cookie students would be hoping for either.  This realization then lead me to google "brownie cookies" (while simultaneously crossing my fingers and hoping such a thing would already be in existence). Luckily, and to my delight, the Brown Eyed Baker had already taken this plunge into the big brownie or cookie debate. 


I followed her recipe, and my husband (quite the chocolate expert) approved...and approved...and (just for good measure) approved the recipe one last time. 


So, in case you get the hankerin' for a chewy brownie with a crunchy outer shell, give this recipe a GO!

Ingredients:


16 ounces bittersweet chocolate (I bought 4 Ghirardelli 4oz bittersweet chocolate baking bars)

4 Tablespoons unsalted butter (softened)
4 eggs
1-1/3 cups granulated sugar
1 teaspoon vanilla extract
1/2 cup all-purpose flour
1/2 teaspoon baking powder
1 cup semisweet chocolate chunks (that ooey gooey center)

Directions:

  1. Chop up 16 ounces bittersweet chocolate. Put butter and chopped chocolate into a heat proof bowl and double broil over simmering water. If you don't have a double broiler--I use a large soup pot and fill with about 2 inches of water. I let it come to a simmer. I put the ingredients that need to melt in a smaller pot (or any heat proof bowl). I hold the smaller bowl/pot over the simmering water and stir ingredients until completely incorporated and mixture is smooth. Put melted chocolate mixture to the side and allow it to come to room temperature. 
  2. Preheat oven to 350 and line baking sheets with parchment paper (wait until chocolate mixture is cooled)
  3. Whisk together eggs, vanilla, and sugar in a medium size mixing bowl.
  4. In a small mixing bowl, sift together flour and baking powder.
  5. Add the cooled chocolate mixture to the eggs, vanilla, and sugar mixture. Stir well to combine. 
  6. Slowly add the dry ingredients, FOLDING them into the batter. 
  7. Once the flour mixture is incorporated, add the chocolate chunks.
  8. I have a large cookie scoop, so I filled the scoop about 3/4 full for each cookie. Cookies will spread just a little, so make sure you don't place them too close together on the prepared sheets. 
  9. Bake for 10-11 minutes or until firm on the outside. DON'T over bake. Cool on baking sheets or transfer to wire cooling racks after a few minutes if you need to reuse baking sheets. 
Yield: about 28 ooey gooey brownie cookies 

**TIP- do NOT put batter into fridge in between batches. My second batch of cookies came out a little lumpy... husband says they still taste just as good, but aren't as nice looking as the first batch. 

Cookie on the right is from the first batch, and the cookie on the left is from the second batch (cooled batter). It also took about a minute longer to bake the second batch.


Friday, September 21, 2012

Bakery Club

The first few months, being a homeroom teacher to a 6th grade class is more about being their "mother" than their teacher. They are overwhelmed by the homework, the number of teachers and each teacher's particular teaching style, locker changes, folders, schedules, planner, etc. They have never had lockers before, and organization... psh, they have no idea what that word means!

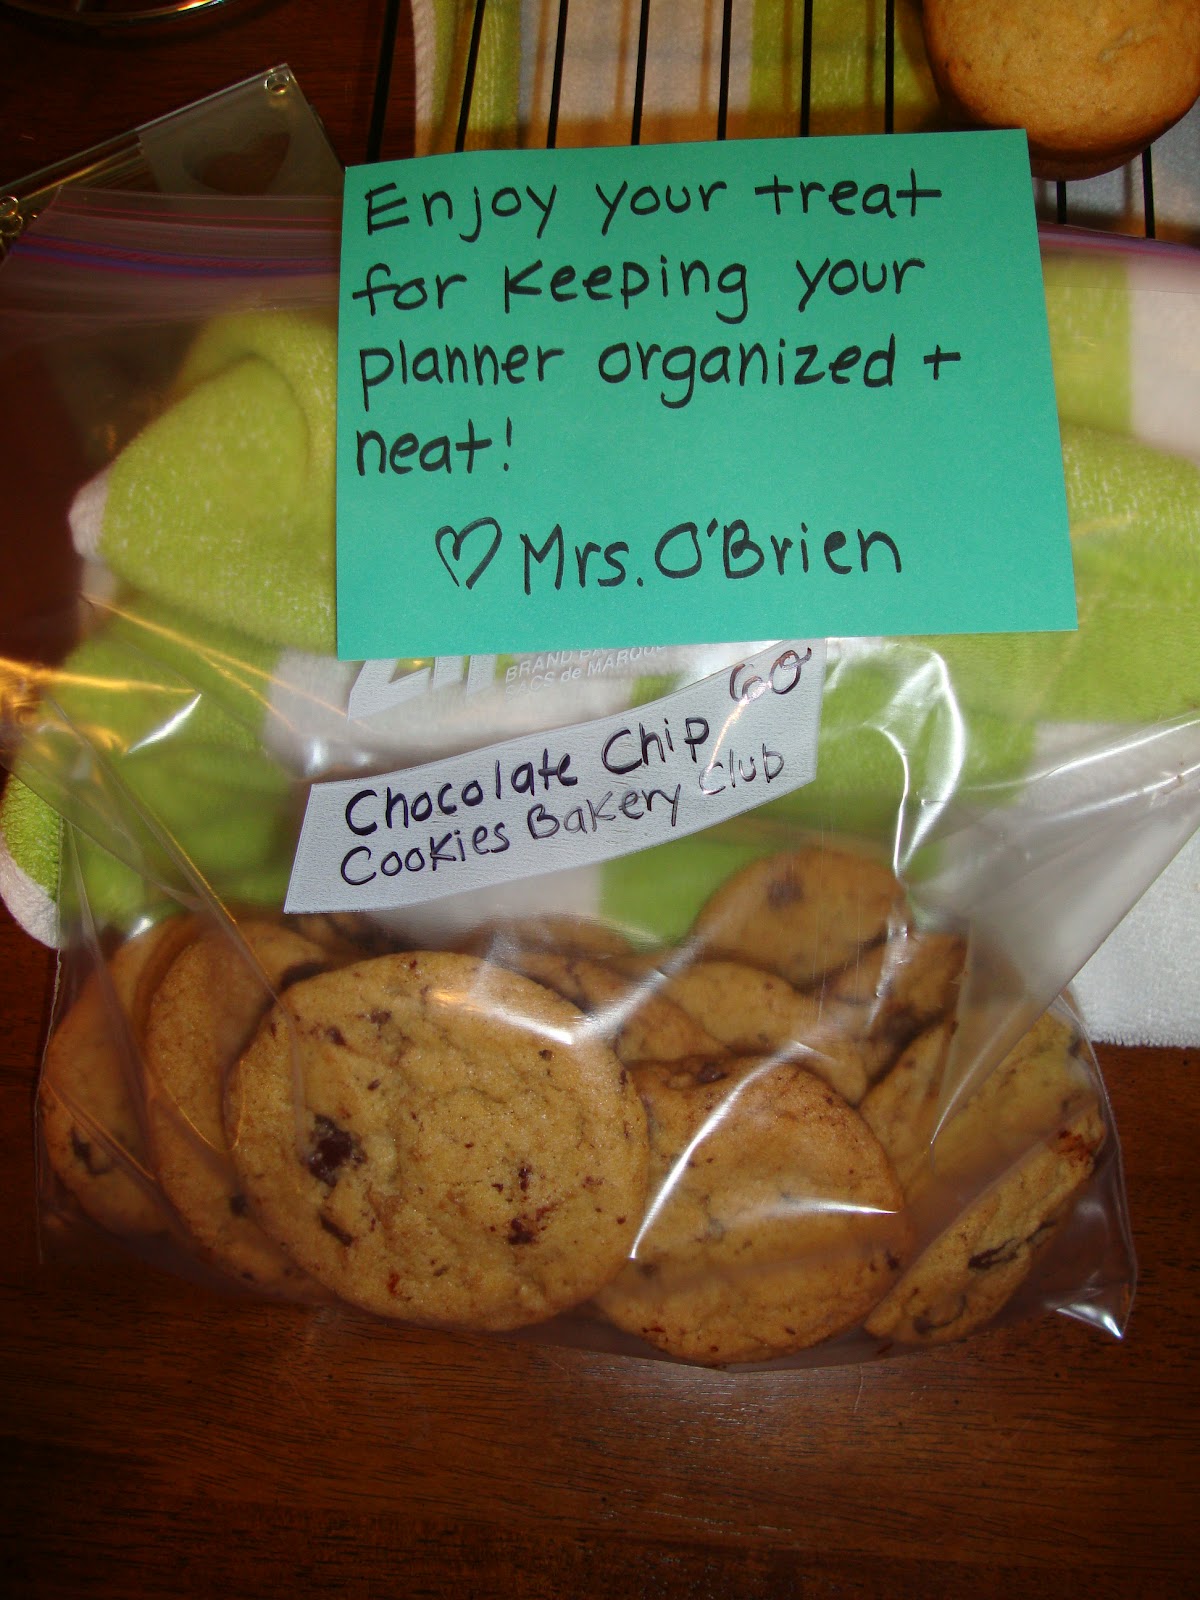
Kids like sweet and yummy homemade treats, so this year I decided to start a Bakery Club in my homeroom class.  Every few weeks I check their planners to make sure they have all their assignments, projects, tests, and quizzes written down for the week, and if they do.... they get to decide which treat they would like for me to make. 

Last Bakery Club (2 weeks ago) I made
The Tender Crumb's Chocolate Chip Cookies. The kids thought they were pretty good (they liked the amount of chocolate), but they thought they were a bit tough. That's the best part about teacher 11 year old kids- they are BLATANTLY honest. Great group to test out new recipes on! 

This time 11 out of the 24 kids in school today were able to achieve Bakery Club status. One student is lactose intolerant (and also many other allergies), so I had him tell me one of his favorite snacks that I can get from the store. The other 10 students were in a deadlock on choice of sweet. Five students wanted brownies, and five students wanted more chocolate chip cookies (but chewier)! 


So, being the tie-breaker, I chose
Brown Eyed Baker's Better than Brownies Chocolate Chip Cookies. Hopefully they will turn out well for the kids! I'll keep you posted...