Wednesday, October 24, 2012

Jalapeno Jack Cornbread

Today we decided that since the weather forecast predicted less than hellish temperatures in Florida, it was finally time to bust out the crock pot and dust off the chili recipes. We set it all up this morning and went on our way to work. I decided on the way home from work that nothing tastes better with chili than cornbread, so I pulled out my corn meal and got to work.

We LOVE spicy foods in our house, so jalapeno was a necessary ingredient. The inspiration came from my the supervising teacher during my teaching internship in Georgia in 2008. She was such an amazing cook-- she always made sure I was fed, and fed well.

Having grown up in the South, I have had my fair share of cornbread, but I will go out on a limb here to make the claim that this is BY FAR the best damn cornbread I have ever had!

Ingredients:
  •   1 medium size jalapeno (remove seeds and chop finely)
  • 1 1/4 cups all purpose flour
  • 3/4 cup corn meal
  • 1/4 cup sugar
  • 2 teaspoons baking powder
  • 1/2 teaspoon salt
  • 1/8 teaspoon cracked black pepper
  • 1/8 teaspoon cayenne pepper
  • 1/8 teaspoon paprika
  • 1/2 cup whole milk
  • 1/2 cup shaken buttermilk
  • 1/4 cup vegetable oil
  • 1 egg
  • 1 1/2 cup pepper jack cheese (grated) 
 Directions:
  1. Preheat oven to 400 and seed and dice up jalapeno.
  2. In a large mixing bowl combine flour, corn meal, sugar, baking powder, salt, pepper, cayenne, paprika, jalapeno, and grated cheese. 
  3. In a small mixing bowl whisk together milk, buttermilk, oil, and egg.
  4. Pour liquid mixture into dry mixture and stir together (just until dry ingredients are moist).
  5. Spray muffin tins and fill 3/4 full.
  6. Bake for 15-18 minutes or until inserted toothpick comes out clean.
Serve warm and ENJOY!

Monday, October 22, 2012

Crock Pot Applesauce

Completed step #3
Doodle Bug loves applesauce, and I love to bake with applesauce as a replacement for oil. I figured, if I am baking with applesauce in order to have a healthier end result, I better start making my own applesauce so I know the exact ingredients. It's really not as difficult as you might think to make your own applesauce. All you need is a crock pot, and you can start the applesauce making wheels in motion.

Ingredients:
  • 4 large apples (I like to use organic when I am cooking for Doodle Bug)
  • fresh lemon juice
  • 1 cinnamon stick
  • 1 teaspoon butter
  • 1/4 cup water
Directions:
  1. Peel and core all apples.
  2. Put apples in crock pot with cinnamon stick, water, lemon juice (a few squirts), and diced up butter.
  3. Cook on high for 1 hour and 30 minutes- 2 hours.
  4. Pulse cooked mixture in food processor and let cool. 
  5. Store in large mason jar in refrigerator.  


Sunday, October 21, 2012

Pumpkin Spiced Waffles

post waffle trip to the pumpkin patch!
It must have been that pumpkin spice latte from Starbucks that started me on this pumpkin kick which is spiraling out of control. Until last month I had never even attempted any recipes with pumpkin in them. Now, I. Just. Can't. Stop. It doesn't hurt that Doodle Bug LOVES pumpkin. Her Grammy and Grampy take her to Panera often for Pumpkin Muffies (her addiction to Panera's Pumpkin Muffies is what started me on my muffin baking binge).

So, what did I decide to make this morning for breakfast? Pumpkin Spice Waffles. These are SUPER easy to make... and VERY yummy-- complete with Doodle Bug's seal of approval.

The batter makes up to 6 servings. We used 1/2 of the batter and covered the rest with cling wrap. It will stay good in the refrigerator for up to one week. You just need to stir it up again really well before using.

Ingredients:
  • 2 eggs
  • 2 cups all purpose flour
  • 1 cup milk
  • 3/4 cup buttermilk (just because I had it in the refrigerator and needed to use it-- if you do not have buttermilk you can use regular milk)
  • 1/2 cup vegetable oil
  • 1 Tablespoon sugar
  • 4 teaspoons baking powder
  • 1/4 teaspoon salt
  • 1/2 teaspoon vanilla
  • 2 Tablespoons or more of pureed pumpkin
  • 1/2 teaspoon Pumpkin Pie Spice
Directions:
  1. Plug in waffle iron so it can get nice and hot.
  2. In stand mixer beat eggs until they are light and fluffy. Add milk, buttermilk, vanilla, oil, sugar, and pumpkin and mix together.
  3. In a small mixing bowl, sift together flour, baking powder, salt, and pumpkin pie spice.
  4. Slowly add dry ingredients to wet-- mixing until all ingredients are incorporated. 
  5. Cook according to the directions on your waffle iron.  
Tuckered out and snuggling with her baby pumpkin
Enjoy! We did!

Saturday, October 20, 2012

One Trifling Fool

My parents are directors of a local youth ministry, and they are having a fundraiser this weekend for their annual ski trip. Mom likes to sign me up to make desserts, so this time I made a Chocolate-Strawberry-Trifle. I love to make this recipe for many reasons.
  1. It gives me a reason to make my husband's favorite chocolate cake from Barefoot Contessa.
  2. I get to layer all the ingredients in the trifle bowl (something about this is calming to me- it's like a challenge each and every time I make a trifle)
  3. I get to experiment with different toppings and textures. Let my creative hair down for a bit :)
This time for the trifle guts I chose: chocolate cake, strawberries and raspberries, Cool Whip, and chocolate pudding.

The first thing that I do is bake the cake. The Barefoot Contessa recipe will make two 9 inch round layers. I usually bake one 9 inch round and then make about 15-16 cupcakes with the remaining batter. The cupcakes only need to bake for about 15 minutes (or until inserted toothpick comes out clean).

While the cake is cooling (needs to be cooled completely) I cut up the strawberries (one whole package) and sprinkle them with about a Tablespoon of white sugar. I let the strawberries sit in the sugar mixture for a few hours in the refrigerator.

Once the cake has cooled, I break it up into 1 inch pieces. I use two bowls to separate the pieces of cake (this way I know the layers will be even in the trifle). I always have a little bit of the layer cake left (enough for a taste test for the hubby).

Next I make the pudding. I buy two large boxes of instant pudding and prepare it just as the box indicates. Because I am making a double batch (two boxes), I mix the pudding on low (to avoid splash). Heads up--this much pudding calls for 6 cups of milk.

While the pudding is setting in the refrigerator (takes about 5 minutes), I begin to layer the ingredients. I always start with a layer of strawberries on the bottom and around the bottom of the trifle bowl. I then pour 1/2 of the pudding mixture inside the ring of strawberries. Next I add the chunks of chocolate cake. On top of the chocolate cake I spread a thin layer of cool whip. On top of the Cool Whip I add another layer of strawberries (and a decorative ring against the trifle bowl). On top of strawberries I add the rest of the pudding mixture. On top of pudding I add cake. On top of cake I add Cool Whip. For decoration I add another ring of sliced strawberries. I also add four halved strawberries in the center with a raspberry. I cover the trifle with cling wrap and refrigerate until time to serve.

Scoop and enjoy!

I had a little extra of all of the ingredients this time... so I made four small ramekins of personal size trifles.

Monday, October 15, 2012

Baby on a Budget

Doodle Bug's 1st picture
This week marks the 2 years since Doodle Bug has entered our lives. Weeks post conception my husband and I began to skimp, save, and pinch pennies knowing we wanted to make sure we had everything we needed for our little bug. We were thrifty-- bought big ticket items little bits at a time, shopped the sales, and knew that 2nd hand could be just as nice (especially on the wallet) as full retail items. We had a trip in the works for the summer of 2011-- IRELAND! Due to the nature of this European adventure, we had already set aside enough money to pay for our flights. We later joked that we should have named our little girl Ireland-- once we confirmed the positive pregnancy test with an ultrasound and heart beat, our Ireland fund was instantly transformed into baby O fund.

Being first time parents, we had NO clue what we were getting ourselves into. We were not sure what baby items were "necessities" and which items were "excessive." Not only were we first time parents, but we were also the first of our friends to take the plunge into the icy, uncharted waters of parenting. We had a bad case of need vs. want. What will baby need? What will baby want? What we soon realized in the weeks/ months post birth was that there are very few items that a baby NEEDS. Its needs are met through love and attachment to mom and dad. I wish I had known more then, but I guess that's what parenting is- just a giant learning curve... and just when you think you have the hang of it, you are thrown a curve ball!

Many of my friends are starting families soon, or at least thinking of starting families soon, and many asked me which items I would recommend. I figured I'd make a list of baby things that I felt were necessary vs baby items our family left completely neglected-- still unused 15 months later.

We take a very natural "organic" approach to parenting, and have been pleasantly surprised with the results. I guess if I had to label our parenting "style" we would fall under the umbrella of Attachment Parenting. We did what felt natural to us... and it wasn't until later that I realized we followed many of the principles of attachment parenting. The 7 Baby B's of Attachment Parenting (outlined by Dr. Sears) encourages: Birth bonding, breastfeeding, babywearing, bedding close to baby (co-sleeping), be-wearing of "baby trainers", and balance in your personal, and family life. I will write a post soon about which of the 7 B's we embrace-- and how this works for our family.

The beauty of parenting is that you get to pick and choose what works for you, your baby, and your family unit. Many of the baby "items" on my list/ not on my list have to do with our parenting choices (not to be confused with the idea of-- what we do is right, and what you do is wrong!) We do what is "right" based on the current needs of our family, ie what works for us.

With that disclaimer of sorts, let me just state that that it's amazing when I reflect on how many items and baby accessories our modern American society convinces us that our babies "need" in order to develop healthily and happily. Many products I deemed to be synonymous with the term "baby" are not even used by doodle bug (now or ever). We are not perfect as parents (who can be??), and we are always evolving and changing. The philosophy that has done us well is to take each day as it comes, laugh often, and love fully.

List of top 15 items that I'm glad I bought on the cheap/ registered for:
  1. A quality breast pump and pump accessories. I used that baby til it DIED! I pumped on my plannings everyday from November 1st- June 1st.
  2. Nursing tank tops-- I kept putting off buying them, but by 6-8 months I had one in just about every color. Convenient, alternative to nursing bras, modest with nursing in public... really just an all around winner.
  3. Sleepy Wrap (now called Boba Wrap) This was a gift from a co-worker who had 7 children--- you read that right SEVEN! She said it was a life saver, and she was right! Doodle Bug LOVED to be worn... and I loved to snuggle her close. 
  4. BabyHawk Mei Tai Carrier Awesome gift given to me by my aunt and uncle :) Used all the time during her first 12 months.
  5. Pack-N-Play. We actually regisitered for two and were lucky enough to get both as gifts. Doodle Bug still uses them 15 months later-- on a daily basis. We keep them at multiple houses to ensure that she has a place to sleep no matter where we are... we are a family on the go-go-go, and she has adapted seamlessly to our busy lifestyle. 
  6. Craigslist changing table. Seriously-- this was a no-brainer. We use this all the time and were happy to find the $40 steal online. 
  7. Fisher Price Newborn/Infant Rock 'n Play Sleeper Doodle Bug slept in this for the first six months of life. It snuggles them in and is great for first time parents because you can take it with you all over the house. Also, I was so paranoid when she was a newborn (rocked some serious PPA) that I wanted her to sleep right next to me. I was afraid to co-sleep with her when she was a newborn, and for some reason I didn't like her bassinet. I liked her sleeping at an angle. Anyway-- for all these reasons I was stoked when my awesome in-laws showed up on my doorstep with this amazing contraption less than 30 minutes after I mentioned wanting one. It easily folds up and made many road trips with us in those first six months. 
  8. Diapers, Diapers, and more Diapers. Calling all diapers, butt creams, and wipes --- diapers of all kinds. We registered for all different brands- cheap, expensive, Eco friendly, not so Eco friendly. We registered and bought some cloth diapers as well for when I stayed home the first four months. Doing cloth diapers while at home on maternity leave with no pay did help to save money. Cloth diapers aren't as awful as it seems- especially with a breastfed baby (poops are water soluble-- and smell more like old popcorn than grown ass man poo).  I found some great deals on amazon and cloth diaper swap groups. GASP-- yes, we did buy lightly used cloth diapers. We didn't cloth diaper for long. Mostly because when I went back to work I didn't have the time or the energy. We seriously didn't have to spend a dime on diapers for the first 6 months of her life-- thank you registry!
  9. Jar of Coconut Oil. Used for many reasons-- a few of which for babies includes, but is not limited to: natural treatment for diaper rash and cradle cap. Oh, and cracked/sore nipples in the beginning.
  10. Umbrella Stroller- small, affordable, and easy to travel with. They are inexpensive, so you can buy one for each car!
  11. Car seats my mom was smart enough to encourage me to resister for more than just the infant seat, but the toddler seat as well. It was an awesome surprise to get BOTH as gifts from friends.
  12. Bath Insert I'm not referring to the large infant plastic tub thing. I'm talking about a little mesh seat that can be used in the kitchen sink. The large plastic tub that was given to us is in the attic-- never have been used.
  13. Boppy I used this multiple times every day for bug's first 12 months. I still  use it on occasion to feed her. When she was little I used it for feeding, tummy time, something to prop her up, and when I was exhausted and with out sleep-- a pillow.
  14. Playtex drop in bottles and liners when I went back to work I tried more bottles than I care to remember with little bug. Playtex dropins were finally the only ones she would take. 
  15. Newborn bouncer/ vibrating seat this was given to us as a hand me down, but if it hadn't been given to us I would have shelled out the money for it! Great place for baby to nap!
What I wish I hadn't registered for/ paid for/ items barely used or not used at all: 
What did I used to think of when I heard "baby"? Crib, pacifier, bib, bottle, formula, jars of baby food, cereal, etc. Not so much anymore ;)
  1. Crib- and all cribish accessories. This is the first thing I thought of buying-- when I thought "baby," I instantly associated "crib." This item we have found to be completely unnecessary. She has taken a total of two naps in her crib. I can at least take solace in the fact that I bought the crib second hand and only spent $100. 15 months later we are finally using the mattress-- we set up a Montessori style toddler room for her to play and nap in. I will devote a different post on how we did this and why. All in all, it has been awesome :)
  2. Pacifiers she was never interested, and I didn't overly encourage it. We had some latch issues in the first few weeks of her life, so I didn't want to introduce the pacifier because I was afraid she would have nipple confusion. 
  3. Big newborn bath tub this item is in the attic never having NEVER been used
  4. Bibs never once needed one
 Baby junk you are convinced you need, but really just completely worthless (to us at least):
  1. wipe warmer
  2. fancy stroller
  3. expensive glider/rocker
  4. outfits for every occasion- our bug was born in July- she wore onesies for the first few months of life.
  5. nail clippers- your teeth and a nail file work just fine (this is what bug's doctor told me)
  6. swaddling blankets (take the newborn ones from the hospital)-- these are free and you can take as many as you want.
  7. newborn shoes (really?? They aren't going anywhere fast)
  8. formula-- milk straight from the tap is better for baby and completely FREE! Plus it means no warming and preparing bottles in the middle of the night.
  9. Jars of baby food-- seriously! This is SO easy to make yourself- it saves money and is healthier! Baby Led Weaning is the way to go! I did very little purees, but when I did I made my own for 1/2 the cost and for much healthier. 
  10. really nice burp cloths- just buy a pack of cloth prefold diapers! I used the cloth diapers for burp cloths and spit up rags for the first 6 months or so.
Learned many a great lessons this first time around, and now I have to ask myself... What will I buy/ invest in next time that I didn't with doodle Bug?
  1. The only item I wish I had this time is an Ergo Baby Carrier. I borrowed one from a friend when we went to California this past summer-- it was so easy to use and comfy that I will just have to break down and buy one next time!
  2. I will spend some serious $$ on some birthing classes to try to prevent another c section. I'm thinking Bradley classes and possibly Hypnobabies as well.
  3. I will also shell out some money to see a Lactation Consultant directly post birth next ime to try to address latch issues before it becomes overly painful.
  4. Probably invest in a Doula and PP support as well. Those PP horomones are NO JOKE!
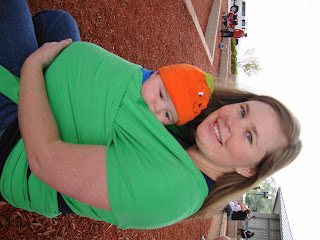
Snug as a bug in her Sleepy Wrap- best gift ever! This is the gift I now give to expecting moms :)

Wednesday, October 10, 2012

Grab and Go Oat Muffies

LOVE to experiment with toppings!
On a money saving kick and needing to find cheap, yummy, healthy, and quick morning snacks, I hit Pinterest hard until I found pictures and recipes that inspired me to kick it full gear in the kitchen. Cheap, yummy, healthy, and quick-- now that's a tall order to fill.  I found solace in two blogs KatieGrauke.com and Sugar-Free Mom. I took ideas from both recipes, and raided my stocked pantry and refrigerator for a few extra ingredients. The whole purpose of these muffies focused on using what we already had in our fridge/ pantry... hence no extra money spending! I encourage you to take the "Everything but the Kitchen Sink Challenge" as well :)

I LOVE that these oat muffies can be personalized with many different toppings, but what I love MORE than the toppings is that they can also double as lactation support muffins! Oats, dried fruit, flax, brewer's yeast... all of these boost milk supply!


Blueberry!


Ingredients:
  • 2 eggs
  • 1 teaspoon vanilla extract
  • 1 1/4 cup homemade applesauce (sugar-free mom calls for 2   cups-- all I had left of Doodle Bug's applesauce was 1 1/4 cup)
  • 1 mashed banana
  • 1/4 cup packed brown sugar (husband is allergic to artificial sweeteners/ substitutes)
  • 1/4 white sugar
  • 2 Tablespoons softened butter
  • 2 3/4 cups milk
  • 5 cups oats
  • 1/4 cup flax seed meal (we use the golden)
  • 1 Tablespoon cinnamon
  • 1 1/4 teaspoon All Spice
  • 2 Tablespoons baking powder
  • 1 teaspoon salt
  • 1 Tablespoon Brewer's Yeast

Directions:
  1. Preheat oven to 350.
  2. In a stand mixer (fitted with the paddle attachment), cream butter and white and brown sugar.
  3. Add eggs (one at a time), beat well after each egg
  4. Add vanilla, mashed banana, and applesauce and mix together
  5. In a large mixing bowl, stir together oats, brewer's yeast, flax, cinnamon, all spice, salt, and baking powder.
  6. Turn mixer on lowest speed and scoop (I use one of Doodle Bug's little cups) oat mixture into wet mixture. Mix only until all ingredients are incorporated. 
  7. Pour milk into mixture and stir to combine.
  8. Spray muffin tins and fill 3/4 full (I use a large cookie scoop).
  9. Add toppings as desired and bake for 30 minutes or until inserted toothpick comes out clean.
Yield: 30-31 muffins 
Toppings I used:

For Doodle Bug and mom:
  1. (16) I added frozen blueberries and dried cranberries to the mixture 
  2. (6) For a few of the muffins I added frozen blueberries and raspberries
For husband:
  1. (3) Dark chocolate, walnut, and coconut (left over from German Chocolate Cake
  2. (3) Dark Chocolate chunks on top with dried cranberries in the mixture
  3. (3) Peanut butter chips and walnuts added to the top 
TIP: When making these again I would use muffin liners- In the spirit of the challenge I didn't go buy them today, but next time I will-- would just make them easier to store/ freeze.

Monday, October 8, 2012

Lovin' From the Oven's S'mores Cookie Bars

I checked planners again this week for Bakery Club and 4 of my 26 students qualified. Many students forgot to write down ALL their tests and quizzes for the week which is why BC's numbers are down this go 'round.

I asked the kids what they wanted this time (usually they are quite direct), but this time they were a bit more adventurous. I think that this is due to that fact that I made a combo brownie/cookie last time that they LOVED! I told them I had been scouring Pintrest for something yummy and "different" for them to try. They were excited to hear all of my choices, and finally settled on S'mores Cookie Bars.

This recipe comes from Lovin' from the Oven. The kids practically drooled when they heard this choice. So, Lovin' from the Oven, I'll have you know that your recipes aren't just yummy looking, but 6th Grade approved as well. Let me tell ya-- it takes A LOT to impress these guys ;)

I followed her recipe almost exactly... I will include a few tips and tricks that I used as well.

Give these a go-- they are super easy and yummy!

Ingredients:
  • 1/2 cup unsalted butter room temperature (I'm a stickler for springing for "real and good" butter)
  • 1/4 cup packed light brown sugar
  • 1/2 cup white sugar
  • 1 large egg
  • 1 teaspoon vanilla extract
  • 1 1/3 cup all purpose flour
  • 3/4 cups graham cracker crumbs (you can make your own using a food processor, or you can buy the box of graham cracker crumbs in the baking aisle for about $1-$2 less)
  • 1 teaspoon baking powder
  • 1/4 teaspoon salt
  • pinch of all spice (just because I love it!)
  • 2 king size Hershey's chocolate bars
  • 1 1/2 cup marshmallow fluff
Directions:


  1. Butter and lightly flour 8x8 pan and set aside. Preheat oven to 350.
  2. In a stand mixer fitted with the paddle attachment, cream butter, sugar, and brown sugar until light.
  3. Add egg and vanilla and continue to beat until all ingredients are incorporated. 
  4. In a large mixing bowl, whisk together flour, graham cracker crumbs, baking powder, salt, and all spice.
  5. Slowly add dry ingredients to wet ingredient, mixing until incorporated. (I use one of Doodle Bug's small plastic cups as a scoop-- easier to measure out dry ingredients when adding to wet)
  6. Split dough in half-- put 1/2 of dough in refrigerator while layering the bars. This will help the dough slightly cool and will make it easier to spread for the top layer. 
  7.  Spread 1/2 of dough into the greased 8x8 pan. 
  8. Place chocolate bars on top of the cookie dough. I had to trim one of the chocolate bars about 1/4-1/2 inch in order for them to both fit. You want a single layer-- and this layer should be no more and 1/4 inch thick.
  9. Spread marshmallow fluff on top of chocolate bars in a thin and even layer. 
  10. Lightly flour your clean kitchen counter top and take chilled dough out of refrigerator. Use floured rolling pin to help spread out cookie dough. Take pieces of dough and add them (like patchwork) to the top of the marshmallow cream. After all pieces are added you can easily and lightly press down on dough to flatten and make even. 
  11. Bake for 30 minutes until edges are slightly brown.
  12. Let cool completely before cutting. For easier cutting-- I put the cooled dish in the refrigerator for a few minutes to let the cookie bars firm up a bit! These are Ooey Gooey!!
Yield: 16 cookie bars
The finished product! Too  gooey for treat bags!

Saturday, October 6, 2012

Hungry Hungry Hummus

So, the husband and I were trying to find ways to cut corners and save a little money the next few months and we thought... since we both consume an ungodly amount of hummus each week with lunch and afternoon snacks, why not make our own? 

We have been really great about eating in and shopping the sales since Doodle Bug was born. We've still managed to even take a few trips. I went to Las Vegas with my childhood best friends for a Bachelorette Weekend in March, as a family we went to California for a week in July, and just last weekend I went to Atlanta for another Bachelorette Party. We will be going back up to the ATL later this week for Linsey and Dave's wedding. I have had four friends get engaged in the past year and 1/2! I am loving all the amazing wedding festivities, but my wallet has gone into retirement, and I've only got my change purse to work with for the next few months. What can a girl do where she has another Bachelorette Weekend in February in NYC to save up for?? The answer-- get crafty and thrifty in the kitchen!

We have tried to make our own hummus before, but never really LIKED the way it tasted. A co-worker told me this week that she makes her own and that the key to yummy hummus is Tahini. DUH! Why did we skip this important ingredient in the past?? Probably because we were trying to be suppa thrifty. So, if you are contemplating making your own hummus, Tahini is a MUST BUY. It will run you about $5-$10 depending on the size jar you buy, but it will last through quite a few hummus batches. 


Here's the modified recipe I used (this is a double batch of hummus-- one for me and one for the husband):


Ingredients:

2 15ounce cans of chickpeas
2 Tablespoons olive oil (next time I'm going to try to make with coconut oil-- so good for you!)
4 Tablespoons Tahini paste 
1 teaspoon salt 
pinch ground black pepper
1/4 teaspoon cayenne pepper
1/4 teaspoon paprika
dash of crushed red pepper flakes 
Juice of 1 fresh lemon
1/4 cup water
6 large garlic cloves (back away students!!!)

Directions:
Drain one can of chickpeas and lightly rinse. Pour rinsed chickpeas into food processor. Add second can of chickpeas with the juice. Combine the rest of the ingredients in the food processor and mix until creamy (about 1 minute). While hummus is mixing add 1/2 Tablespoon or more extra olive oil to smooth the consistency.

This made enough hummus for my husband and I for an entire week! Enjoy!