Friday, October 4, 2013

Simple and Sweet Pumpkin Muffins

Fall inspired baking commenced this past weekend. Saturday morning Doodle Bug woke up with a hankering for a pumpkin muffin. I didn't want to eat at Panera's again (where I knew they had pumpkin muffins), so off we went on a Mother-Daughter quest for the elusive pumpkin muffin. We first went to Sweet Theory, a local amazing vegan bakery, but they were not open. We then walked down the street and around the corner to the fabulous Cool Moose Cafe. Cool Moose has FABULOUS muffins that they slather with butter and GRILL for your gluttonous pleasure, but blueberry and morning glory muffins were not on Doodle Bug's immediate agenda (no matter that mom's mouth was watering at the thought of the crunch of the grilled muffin crust).  So, off we went to Einstein Bagels, where at long last, the pumpkin muffin was discovered. She gobbled up her muffin in record time while I sipped my pumpkin spice coffee and reflected on the fun that we had seeking out our breakfast.

Finally! A pumpkin muffin!
Doodle Bug LOVES pumpkin. Have I mentioned that before? Probably at least 20 times by now. We first recognized her affinity for all things pumpkin last fall. I, on the other hand, do not enjoy the taste of pumpkin. I adore the spices used in fall baking, but the taste and texture of pumpkin does not strike my fancy. I find it hysterical that our little super, super, S-U-P-E-R picky eater loves pumpkin. It's great for her nutritionally, so I encourage the regular intake of this orange/slimy food (blasphemy, I know).

So, after our morning fun I decided to take a shot at my own pumpkin muffins for her. I found a great recipe online, and I just adapted it to make it a little healthier for my toddler that doesn't understand portion control when it comes to pumpkin.

Okay, so on with the recipe already....

Ingredients:
  • 1 can pumpkin puree (not pumpkin pie)
  • A few TBSP maple syrup (because our family has a slight obsession with the maple goodness)
  • 2 eggs
  • 1-1/2 cup applesauce
  • 2-1/2 cups flour
  • 1/2 cup sugar white sugar
  • 1/4 cup brown sugar
  • 1 TBSP pumpkin pie spice
  • 1/2 tsp salt
  • 1 tsp baking soda
Maple Vanilla Glaze Ingredients:
  • A TBSP maple syrup
  • 1/4  tsp good vanilla extract (I just Mexican vanilla) 
  • a little confectioners sugar (maybe a TBSP)
Directions:
  1. Preheat oven to 350.
  2. In your stand mixer fitted with the paddle attachment, combine pumpkin, applesauce, sugars, and maple syrup.
  3. add in eggs and beat until combined.
  4. sift together flour, pumpkin pie spice,salt, and baking soda.
  5. Slowly add dry ingredients to wet- just mixing enough to incorporate all ingredients. 
  6. Use a large scoop and prepare muffin pans (either use paper cups or spray)
  7. Bake for 25 or so minutes (until inserted tooth pick comes out clean).
  8. Cool on wire racks before storing. 
  9. Combine ingredients for glaze and drizzle over top.
    little minis
Yield: 24 muffins; about 80 mini muffins (bake minis for 10-15 minutes)


I have also made this recipe adding in chocolate chips-- that was a hit with my middle school students!

Enjoy!

Wednesday, October 2, 2013

Scones for the Fall

So, I have been on a scone baking kick for the past few weeks, and I think I have found my favorite recipe yet. It is officially October, so I can bust out the fall flavors and kick them into high gear!

My husband has a work breakfast once a month, and this month I told him to sign me up for scones. They were so easy to make that I thought it would be the perfect easy addition to their breakfast buffet. Well, last night he informs me, "AH... tomorrow is breakfast club." I had a meeting at my church, so I knew I would have to whip up something simple when I got home. I came home at around 8:30, and the house was empty. Doodle Bug, dad, and Archer (the whippet) had gone for a walk. I decided to take this opportunity to create a fun scone flavor instead of just making my previous recipe.

I found an interesting recipe for French Toast Scones with a Maple Glaze, so I thought I would take some ideas from this recipe as well as substituting some ingredients for what I had at home (no time to run to the grocery store!) and the flavors I like best.

This recipe was super easy and produced the best scones I have ever tasted! It is definitely a must try during these fall months!

Just a tip-- use Ceylon cinnamon-- there is absolutely NO comparison! 

Ingredients:

 For the scones:
  • 2 cups flour
  • 1/4 cup sugar
  • 2 TBSP brown sugar
  • 1 tsp baking powder
  • 1/2 tsp baking soda
  • 1/2 tsp salt
  • 2 tsp cinnamon
  • 1/4 tsp all spice
  • 1/4 tsp ginger
  • 1/8 tsp clove
  • 1/4 tsp pumpkin pie spice
  • 1/2 cup unsalted butter (1 stick)
  • 1 cup heavy whipping cream
  • 1/4 tsp vanilla
  • 1 egg, beaten
For the cinnamon sugar topping:
  • 2 TBSP sugar
  • 1/4 tsp cinnamon
For the glaze:
  • 1 tsp pure organic amber honey
  • 1-2 tsp pure maple syrup
  • 2 tsp milk
  • 1 tsp heavy whipping cream (or more if needed)
  • 1 pinch cinnamon and all spice
  • 1 TBSP or more powdered sugar (to thicken)
Directions: 
  1. Preheat oven to 350.
  2. In a large mixing bowl, sift together flour, sugar, brown sugar, baking powder, baking soda, salt, cinnamon, all spice, clove, and pumpkin pie spice.
  3. Cut cold butter into the four mixture. You can use a pastry fork or two forks. mixture should look like small crumbs. I always grate my butter first (just makes it easier to evenly distribute). 
  4. In a medium mixing bowl, whisk together heavy whipping cream, egg, and vanilla.
  5. Make a well in the center of the flour and butter mixture. Pour cream mixture in the center and fold in so that all the ingredients are combined. 
  6. I wanted to make more than 8 scones for this recipe, so I used a medium scoop. Scoop onto pan lined with parchment paper.
  7. Sprinkle cinnamon sugar mixture on top and brush with heavy cream.
  8. Bake for about 10 minutes or until lightly browned (I always rotate my pans 1/2 way through baking because I have a gas oven). 
  9. Take scones out and let cool on a wire rack.
  10. Prepare glaze: combine all glaze ingredients together and drizzle over cooled scones. Allow glaze to set before storing.
  11. Best eaten within 24 hours. 
Yield: 18 small round scones. 

These are DELISH!

Saturday, September 14, 2013

Scones for the Kiddos

I'M BACK! Man, I can't believe it's been since April that I have posted! My laptop, the gentle green girl (that I have had since the spring of 2007), finally crashed for the last time this summer. Actually, the cord literally broke off into the computer. No use trying to spend any money saving that bad boy.

The husband and I are both teachers, so we have iPads and nice school computers, so we didn't think it would be necessary to really have a home computer. Well, I didn't take into account that I would have to "check in" my school laptop for the summer, so no blogging for me for a few months. There are so many awesome recipes that I wish I could have shared (honestly, mainly for my own selfish reasons, because I ALWAYS forget the recipes which is why I started the blog in the first place). I thought that if I typed them up and posted them out on the blogosphere they could never be lost again. So far, it has worked-- with the minor exception of this summer.

The cover to my book :)
So, we are 1/2 way through the first quarter, and I can't believe how fast time is passing. I say this every year, but it is true every year. One of the many reasons why I love what I do is that time passes quickly. I am constantly moving, changing, adapting, and growing, and my students are doing the same. I get to do something completely different every day, and get paid to talk about all the geeky things I love. It doesn't get much better than that! I am still (5 years into it) at the point in my career where I firmly believe on each pay day, "I can't believe I just got paid for that!" Granted, a teacher does not a millionaire (or anywhere close to one) make. I don't need a million dollars though; I'm not even sure what I'd spend that kind of money on... well, I'm sure I could find SOME use for it if I had to... maybe copper cookware, an extra ( or larger) bathroom (we just have the ONE, tiny bathroom), a European adventure for the whole family, lactation support for all women that need it, etc. Who knows?? I digress...

sample student work
My model for the Literary Genre assessment
I had to bring my computer home this weekend to work on some lessons for my 7th grade Reading classes. I am totally revamping my curriculum this year for 7th grade, so I practically feel like a first year teacher again. All the LONG hours gathering supplies and creating my models have re-energized my teacher spirit. I had forgotten how much fun it was to create something new! This year I'm implementing Interactive Student Notebooks with my 7th Reading classes. The DAY before school started I was browsing Pinterest-- nothing new about that haha--, but this time I came across a brilliant idea, the ISN. I found the blog, Everybody is a Genius and became hooked. I had ONE day, but I knew I HAD to to this! I barely slept that first week of school. I bought resources from I'm Lovin Lit's Teachers Pay Teachers store (she has fantastic freebees, too!). The student examples are from the unit I purchased from her. I dove in, and I haven't looked back. It has been fantastic so far-- it keeps the students organized, and allows them to use their particular interests and learning styles to express their knowledge of the subject. I could go on and on about how much I love this notebook, but I'll save that for another blog post.

So, the scones already, right?! Well, about two weeks ago doodle bug started school and subsequently had her first cold ever (how did we make it 2 years??), and ended up with an ear infection... only took 1 day at preschool to get sick. I had to leave work early to take her back to the doctor yesterday to make sure she was all healed up and ready to fly next weekend. I can imagine that an ear infection and planes do not mix well. She was all clear, and according to my sub (who also happens to be my lovely mother), my homeroom students were "angels." I told them before I left that if they were 100% perfect for my mother (whom would never lie to me), then I would make them breakfast for Monday. That was all it took-- the promise of a baked good. So, scones it is. I had actually never attempted scones before, but was excited to finally give it a proper shot.

I found an amazing recipe on Food Network's website. Tyler Florence's Blueberry Scones Recipe looked too delicious to pass up. I pretty much followed his directions and recipe. I did not make the glaze (it looks delicious, but would be too messy for the classroom), but instead added lemon zest to the dough. I also used the same base recipe but swapped the blueberries for chocolate chips for the second batch. I needed about 24 scones.


Blueberry Scones
Ingredients:


  • 2 cups all purpose flour
  • 1 TBSP baking powder
  • 1/2 tsp salt
  • 2 TBSP sugar
  • 5 TBSP unsalted cold unsalted butter (I grated this because I did not have a pastry tool to help me incorporate it into the dough)
  • 1 cup blueberries (I used frozen)
  • lemon zest to taste
  • 1 cup heavy whipping cream (plus more for brushing on top)
Directions: 
  1. Preheat oven to 400
  2. sift together dry ingredients: flour, salt, baking powder, and sugar
  3. Using a fork (or pasty tool), cut in butter. I grated my butter first. The butter coats the flour and the mixture should look like course crumbs. 
  4. fold in blueberries and lemon zest-- be careful not to smash! I may have squished one in the process ;)
  5. Make a well in the center of the mixture and pour in cream. 
  6. Fold everything in just to incorporate-- do NOT over mix! 
  7. Line baking sheet with parchment, and use large scoop to distribute mixture. 
  8. Brush with cream and sprinkle with sugar
  9. Bake for 15 or so minutes (until lightly brown)
They came out SO delicious!

For the chocolate scones I followed the same recipe-- I just used 1 cup chocolate chips in place of blueberries. I did a mixture of white, milk, dark, and semi-sweet chocolate chips. 

I will use this recipe again and again! I hope you like it, too! Happy Baking :)

Monday, April 29, 2013

Husband's *Favorite* Chocolate Cupcakes

The husband celebrates one more lap around the sun tomorrow, and when I asked him what he would like as a treat to celebrate such a milestone, he responded with, "chocolate cupcakes with coffee buttercream!" I didn't really need to ask, because the answer is the same every year. He loves this cake so much that I instinctively purchase the ingredients every April. I wish I could say that I am to credit for the recipe of his FAVORITE dessert, but alas, I am not.

When my husband and I were first married I looked far and wide for a chocolate cake recipe for his birthday. I wanted to wow him with my baking skills AND put to work my new Kitchen Aid stand mixer that I was able to purchase with wedding gift cards (thanks to awesome friends and family). I stumbled upon Barefoot Contessa's Beatty's Chocolate Cake recipe and haven't looked back. It's a winner EVERY time, and it's ridiculously easy (so much for showing off my skills)!

I don't even eat chocolate (GASP-- I know, what kind of a woman doesn't eat chocolate?  But if you suffered from severe migraines due to food allergies, you wouldn't be eager to eat chocolate either-- I'm
happy avoid it!), so when I make this recipe I freeze about 1/2 of the cupcakes/ cake for future events.

**Fun fact-- the first time I made this cake my husband ate so much of it in one day that he made himself sick-- really, I'm shocked he even still likes it**

Usually I follow Ina's recipe exactly... sometimes I will add a little a little ceylon cinnamon to add a little spice.

Ingredients:
  • 1 3/4 cups all purpose flour
  • 2 cups granulated sugar
  • 3/4 cup good cocoa powder (I use the special dark because my husband LOVES dark chocolate)
  • 2 teaspoons baking soda
  • 1 teaspoon baking powder
  • 1 teaspoon kosher salt
  • 1 cup buttermilk (shaken)
  • 1/2 cup vegetable oil
  • 2 extra large eggs (room temperature-- you don't want cooked eggs in your cupcakes!)
  • 1 teaspoon pure (good) vanilla extract-- I use Madagascar vanilla from Green Man Gourmet in Avondale-- they are awesome!
  • 1 cup freshly brewed hot coffee (brings out the rich flavor of the chocolate-- cake doesn't taste much like coffee believe it or not)
Directions:
  1. Preheat oven to 350 and line muffin tins. 
  2. In your stand mixer fitted with the paddle attachment, mix: flour, sugar, baking soda, baking powder, salt, and cocoa on low until combined.
  3. In a small mixing bowl, stir together the buttermilk, eggs, oil, and vanilla. 
  4. With the mixer on low, slowly add the wet ingredients to the dry. 
  5. Add the cup of hot coffee and stir only to combine (make sure to scrape down sides and bottom of bowl). 
  6. Pour batter into a glass measuring cup with spout (this will make pouring batter into muffin tins easier-- batter is very thin). Fill each muffin tin 1/2 full (no more or cake will spill over). 
  7. Bake for about 15 minutes or until inserted toothpick comes out clean. 
  8. I swear it is just that easy!
**I usually make 1-2 dozen cupcakes and then pour the rest of the batter into small rounds, bake for about 25-30 minutes, and freeze for later occasions**

 Vanilla Coffee Buttercream
It's taken me a few times to perfect my attempts with coffee buttercream, but I do believe that this recipe is my favorite so far! I used the base of the recipe from The Kitchen is my Playground and then just made it work with what I had in my kitchen. I didn't have instant coffee, so I adapted the recipe using fresh brewed and then chilled coffee. 

Ingredients:
  • 4 Tablespoons freshly brewed and chilled coffee 
  • 1 Tablespoon real Madagascar vanilla extract
  • 3 sticks unsalted (softened) butter
  • 3 cups confectioners sugar
Directions:
  1. Beat softened butter in bowl of stand mixer fitted with the paddle attachment on medium speed for about 1 minute or until fluffy.
  2. Turn speed to low and add confectioners sugar one cup at a time (scrape down sides and make sure it is fully incorporated).
  3. Increase speed to medium and beat for about 3 minutes.
  4. Add coffee and beat on low speed to combine. Scrape down sides and increase speed to medium and beat for about 4 minutes. 
  5. Fill pastry bag and have fun piping away! I added a little dark chocolate chip to the top just for a little extra decoration.
**should make enough to frost 24 cupcakes**

Happy 31st birthday to the best husband in the whole entire world. Doodle Bug and I are so lucky to have you!

Saturday, April 20, 2013

The Adventures in Potty Training

So the day has finally come... and much earlier than we expected... Doodle Bug is interested in the potty.

We decided awhile back that we were just going to wait and follow her cues to see when she wanted to start potty training. We didn't want to rush anything, and thought that we would just let nature and curiosity run its course. Last weekend we followed her cues... right to the toilet.

For about two months or so we have been concerned thinking that DB was constipated. She seemed like she was having a hard time going and looked to be very uncomfortable. We upped her Greek yogurt intake, added more dried fruit (especially raisins-- her fav!), encouraged an increase in her water consumption, and laced her sippy cup with a daily probiotic. I increased my water intake as well, and encouraged her to nurse more often, but with all our efforts she STILL seemed to be uncomfortable. What were we to do?? Well, we had our answer last weekend.

Last Friday, while at work, my MIL sent me a text message.
"Ev just took off her diaper and peed on the floor!"
I couldn't help but respond with,
"bahahahah"
Everyone at school thought that for sure this was a sign of readiness to toilet train, but I was skeptical.  I am a first time mom, and certainly 21 months is too early to know to potty train, right??  I mean, okay, maybe the girl just likes a little fresh air on her cheeks? So, the husband and I got a little laugh out of the floor peeing at Grammy's house episode, and then we shrugged it off as toddler exploration. Until Saturday morning that is...

DB likes to wake up at the same time every day. She has her set routine (one that neither my husband nor I could take credit for setting) and likes to stick to it. She has been going to sleep between 9-10 P.M. and waking for the day at around 7 A.M. since 3 weeks old (she still wakes to night nurse as well).  So, at around 7 in the morning last Saturday DB and I went to go play in her room. I left to make my coffee, and when I returned I could tell she was struggling to have a BM. Her little face gets so red, and she arches her back, and it just looks like an all around horrible experience. I was frustrated-- why was she STILL struggling after all the changes to her diet??? And then I realized something, maybe she just doesn't WANT to go. Maybe she doesn't like the feel of poop in her diaper... I mean, who would??

With my new found revelation on hand, I decided to put my theory to work. Recently (with in the past month or two) DB's communication skills have taken off. She went from saying only a few words (dada, mommy, pup, Nana, Pop, Granky (for Grampy), ball, egg, etc.) to speaking in full sentences. Last week she turned to me and said, "I'm going to go read a book." I almost cried. I mean my daughter, my "little tiny baby" as we call her is speaking-- fluently. Plus, the English teacher inside jumps for joy anytime I see her WANTING to read. I digress.

I decided to ask DB questions to see if I could get to the bottom of her uncomfortable situation. I asked, "do you need to go poopy?" She nodded yes. I continued. "Would you like to go sit on the big potty like mommy and daddy do when they need to use the restroom?" She nodded yes. Now, she knows all about the toilet because we always take her into the bathroom to flush the waste from her dirty diapers. She waves "bye, bye," and we flush. She also sometimes accompanies me to the bathroom when my husband has late track meets or soccer games. She is a wild one, and if left alone for even 1/2 a minute she will have found a way to scale a wall, or the entertainment center, or dining room table (yes, this has happened- more than once). She loves to flush the toilet and always claps and says, "yay! I did it!"

not actually using the restroom here
So, without hoping TOO much, I took her to the restroom. I sat her on the pot, and within a minute... well, it's all history from there! I was right... she wasn't constipated anymore! She was literally holding it in because she didn't want to poop her pants. She didn't have the vocabulary to ask us to go to the potty, but now she does.

I went and bought the most adorable froggy training potty for her, and we have been working on encouraging her to use it. She understands what it is used for, but has only really had one other successful attempt-- though she did need a little help from her friend Go Dog Go. **she is not actually using the restroom in the picture to the right. She is reenacting the 2nd successful potty event from Thursday night. I read her the book while she sat on the pot, and then yesterday she ran back to the potty with her book to read... haha!**

DB's Montessori Room
On Monday she asked to go "pee pee" and ran to her room. We have a Montessori style playroom/ bedroom for her, so the toilet area is in her room. I opened her door, took off her diaper, and she placed herself on the potty. About a minute later she got distracted by her own image in the mirror (vain much??) and stood up to go talk to "the baby." Needless to say, she peed on the floor. But, at least she asked to go to the potty, right?

So, the adventure in potty training has just begun in our home, but since we are following her cues  and not forcing the issue, it has not been difficult or stressful. We just take it (like everything else that accompanies parenting) one day at a time. My mom told me I was her earliest to potty train, and that I showed an interest at about 23 months and was potty trained by my 2nd birthday. Maybe big girl underwear will be in the works as a 2nd birthday present :)

Monday, April 15, 2013

Track Meet Muffins

What to do with leftover bananas from the husband's high school district track meet? Make banana muffins! I didn't already have a recipe that I LOVED, so I searched banana muffin recipes on my All Recipes app on my nifty I Phone until I found one that I could use as a base recipe. The recipe I decided on had a five star rating (with 2,058 ratings under its belt)! Wow, if that many people were impressed, I knew I just had to try it!

This was a use whatever is in the pantry/ refrigerator recipe, so I tried to add a little something for each one of us to make it incorporate our favorite flavors. For Doodle Bug I added raisins, for the husband I added my homemade spice blend, and for myself I added dried apricots and craisins. I always like to add in yummy extras to suit my family's taste buds.I also took the liberty of squeezing in a little iron and omega 3 by adding flax :)

This recipe is super easy! I'll include the original recipe ingredient list first-- then I will add my extra ingredients spin on it.

Base recipe from All Recipes:
  • 1 1/2 cup all purpose flour
  • 1 teaspoon baking soda
  • 1 teaspoon baking powder
  • 1/2 teaspoon salt
  • 3 large bananas, mashed
  • 3/4 cup granulated sugar
  • 1 egg 
  • 1/3 cup butter (softened)
What I added:
  • 1/2 cup organic flaxseed meal 
  • a handful of rasisins
  • a handful of craisins 
  • a handful of dried apricots
  • 1/2 teaspoon homemade Pumpkin Pie spice blend (you can find my recipe here)
  • 1/4 teaspoon ceylon cinnamon (once you go Ceylon, you NEVER go back!)
  • 1/2 teaspoon Madagascar vanilla extract
Directions:
  • Preheat oven to 350 and prepare muffin tins.
  • In a stand mixer fitted with the paddle attachment,cream softened butter and sugar
  • add mashed banana
  • add vanilla extract 
  • add egg
  • In a small bowl, sift together flour, salt, baking soda, baking powder, cinnamon, and spice blend.
  • Fold in flour mixture, dried fruit, and flax (do not over mix-- will make tough muffins)
  • For large muffins-- bake for 20-25 minutes or until inserted toothpick is clean
Yield:  approximately 17 large muffins

Enjoy!

Saturday, March 23, 2013

AP Our Way: Breastfeeding

Often times: I second guess myself, I worry...I worry some more which leads to panic, I doubt my abilities, and I lack the ability to make a simple decision. But with all the self doubt clouding my judgement, one confident decision I made has subsequently changed my life forever.

**I WILL breastfeed my daughter.**

I researched, read books, and watched countless video tutorials (BOOBIES!! J/K I'm totally a visual/  kinesthetic learner-- smacked you real quick with my teacher lingo).  I needed the books and videos because I did not have anyone in real life to ask for advice from. My mom and grandmothers did not nurse. I was the first of my sisters to get married and have a baby.  Only a few of my close friends were married, and none of them were even thinking about birthing and lactating. Everyone that I talked to about nursing always used the verb *tried*. I didn't want to try.

I knew it was the right choice for our family, and was ready to put up the personal fight to make it happen. It was a spiritual journey for me, and I wish I had started this blog before my pregnancy-- really just so I could look back and laugh at my transformation.

Transformation #1-- choosing to breastfed in general. I was "that girl" that thought breastfeeding was gross. It made me uncomfortable; it made me cringe. I had not grown up with learning about nursing. All my baby dolls had pacifiers and bottles. I had a boyfriend in high school that had a mom that was still nursing her toddler, and I seriously thought it was absurd (give that baby a fork and a spoon). I knew nothing, and was not interested in enlightening myself.

I have two specific memories from my early adult years that I now, when I think back and remember, I cringe for different reasons... I cringe out of embarrassment for my lack of knowledge at the time.
  1. I was in college, and while shopping I saw a mother nursing her child. She was on an aisle by herself, but for some reason I was bothered when I saw her breastfeeding. I can't wrap my head around why other than to think that it was due to my lack of knowledge and judgmental attitude. I never said anything to her, but I did judge her. Now I wonder how many people judge me when they see me nursing in public. I hope they are blessed enough to "learn" about the wonders of breastfeeding one day, too.
  2. My husband and I were in Mass with our family when I noticed a new mom wearing a nursing cover and breastfeeding not far from us. I was confused-- why not just give the baby a bottle? All I could think about was that this woman had her boob out in church! Now, when I see scantly clad teenagers in Mass, I often think back to that mom... why was I sexualizing her desire to nourish her child?
One day while on Facebook (way before the thought of Doodle Bug entered our minds) a friend of ours posted a picture of her toddler's first solids feeding. She mashed up avocado with breast milk, and took pictures of the mess her cutie made trying to "eat" the new food. I.WAS.APPALLED. I told my husband that day that I hoped he didn't expect me to breastfeed-- because it was not NEVER going to happen. Never say never, right??

The transformation began when, in my first trimester, I started thinking about where the hell we would keep all of the baby junk that would be needed to raise our child (later I realized most of this "junk" was senseless and useless, and  that expert marketing advertisements try to make the first time parent believe they CAN'T survive parenting without stuff). Our house was built in the 1940s and is about 1200 square feet. We have three small bedrooms, one tiny bathroom, and a kitchen that's about 100 sf. The answer was: we have no room for bottle/ formula storage.

Then I started to think about waking in the middle of the night to feed. Did I really want to walk to the kitchen, make the bottle, warm the bottle, feed the now WIDE awake infant, and then TRY to get said infant back to sleep, while trying to make sure I had enough sleep to teach 100 students each day? The answer was: no HELL NO.

Okay, so I was going to breastfeed, and since I knew nothing at all, I had to hit the books (and the web) hard.

I became engulfed in the literature. I was amazed-- the science of breastfeeding still awes me to this day. I was learning, and through the knowledge I gained I started my transformation to mother-- mind, body, and soul.

Cool facts that I learned about breastfeeding from WHO:
Did you know (because I certainly didn't):
  1. BM contains antibodies that protects the newborn/infant/toddler from common childhood illnesses that increase child mortality worldwide.
  2. BFing can act as natural family planning (a natural form of birth control). Your body prevents itself from getting pregnant in those first few months in order to protect the newborn's nutritional needs.
  3. BFing can decrease mom's chance of getting breast cancer and ovarian cancer. 
  4. BM lowers the chance of childhood obesity. 
  5. Adults who were breastfed as babies often have lower blood pressure and lower cholesterol, as well as lower rates of overweight, obesity and type-2 diabetes.
  6. There is evidence that people who were breastfed perform better in intelligence tests.
 I mean, after reading all that, how could I still say "no"?

My passion to have a successful breastfeeding relationship led me to question my ability to birth, and resulted in a scheduled C-Section. You can read more about my daughter's birth in a prior post. In recovery she was placed in my arms, and I was instructed by the recovery nurse to "stick it out." She advised me that "the first two weeks were the worst," and that I would be happy later when I stuck it out. I am so glad she told me this... because those first two weeks were worse than I had ever expected!

I kept my daughter at the breast anytime she was awake. I was cracked, sore, and bleeding by the end of the first week. I had to firmly grasp the side of my glider and bite down on my giant straw every time she latched. It. was. miserable. My husband was amazing-- he made appointments with the lactation consultants, drove us to the appointments, and even called my OB/GYN when we realized that I was having severe PPA. I seriously don't know if I would have been able to "stick out" those first few weeks without his love and support. By week two, just as the nurse had suggested, Doodle Bug and I were both starting to get the hang of it. I didn't expect the journey to be so difficult. I didn't realize it was a learning process for both mother AND baby... as a matter of fact, just the other day when Doodle Bug accidentally bit down while nursing and talking I had to remind myself that it is STILL a learning process. Isn't that parenthood in general though?

What I love about breastfeeding: 
  1. I love that my body (pretty much exclusively) was able to sustain the life of my child for the first year of life.
  2. I love that my daughter has been completely healthy for the first 21 months of her life.
  3. I love that when I now see a mom nursing her baby my heart overflows with the love I feel for my child.
  4. I love that we were able to easily travel with her (milk on tap!)
  5. I love that when she falls down, scratches her knee, gets scared, etc I can easily comfort her. 
  6. I love that she intuitively knows how to increase/ alter my milk supply to fit her nutritional needs (this STILL amazes me).
  7. I love that when I was exhausted due to the job of nursing a wiggly toddler (she was about 16 months old) she climbed down off me and the couch went to go play, but hesitated and turned back around and said "tank choo, mama."
  8. I love that she giggles now when after a long day of mom working all day we are finally able to sit down on the couch to nurse.
  9. I love when I hear her trying to hum a tune while nursing and tracing her finger on my chest making little shapes. 
  10. I love the confidence in myself, my body, and my decisions this amazing breastfeeding relationship has provided me.
** what don't I love?? THE PUMP. That thing can die. twice. 11 months of pumping multiple times a day while at work... THAT is exhausting! I have an insane amount of respect for moms that exclusively pump!**

Oh, and biting and hair pulling, too-- those are no fun as well.  

 I am so happy with my decision, and I love advocating for breastfeeding. I started up my Lactation Cookie Company in January so that I could help other moms that might have been in the same boat as me-- wanting to nurse, and reaching out for help from those around them.

I truly believe that breastfeeding has made me a more confident woman, and subsequently a confident mother.

Now I better go get some rest... my toddler will be up for her midnight snack in just a few short hours :) Our philosophy? When the baby cries... Feed it-- that's our approach to AP and BFing. No need for a schedule. She lets us know when she is hungry, tired, needs to be changed, wants to be held... we are just here to follow her cues.
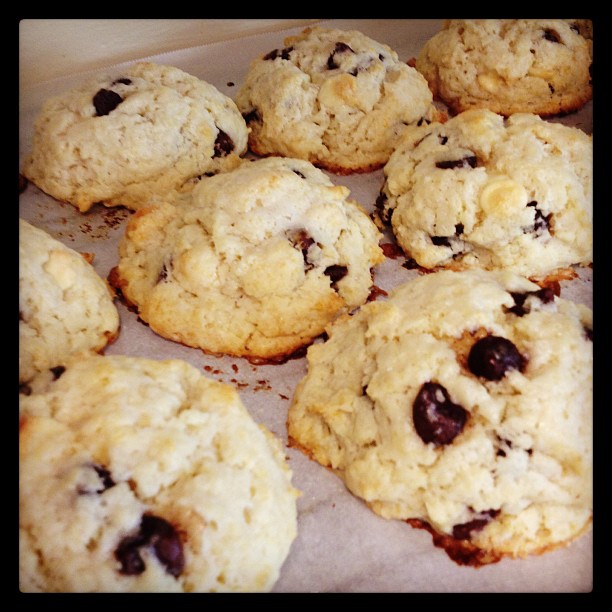
Monday, March 18, 2013

Not your average politically incorrect brownie

St. Patrick's Day was quickly approaching this year, and I wanted a a new recipe to try. I love a good Car Bomb (I mean the tasty kind that comes from a pint glass of Guinness and shot glass full of Jameson and Bailey's), so I trolled pinterest until I found something that spiked my interest-- A Spicy Perspective's Brownies. I had every intention of following her recipe exactly-- take one look at her photos and you would want an exact replica as well, but my body had other plans for me.

I woke up Sunday morning feeling exhausted; I had spent all day Saturday (literally 12 hours) at a lactation convention passing out samples of my Smart Lactation Cookies and talking about a mile a minute about my product. Overall, it was such a fantastic day and a wonderful opportunity to get my name and product "out there", but boy was I tired! After packaging up some cookies for sale and meeting a repeat customer-- YAY!!--, I headed off to my school's annual Carnival fundraiser to work the booths and socialize with the masses. About two hours after arriving I had to leave, and my husband had to tuck me into bed-- I had a fever. I stayed in bed for about 4 hours, and when I woke up and was fever free all I could think about was how I wanted to promised the guys I would make these delicious brownies.

The husband and his friends went to the grocery store to pick up my supplies, but I was not geared up for a "from scratch" dessert, so I asked for a brownie mix instead to help speed things along.

The original recipe seems AMAZING, and next year I might just give it a shot because usually I really love baking from scratch, but if you aren't a freak like me, my simplified rendition of A Spicy Perspective's decadent dessert will have your family and friends toasting their Irish Coffee and asking for more.

** I know that the name of the cake is incredibly politically incorrect, and I in NO way agree of promoting the heinous act that inspired the name, BUT I do love the mixture of Guinness, Jameson, and Baileys... so, can we think of a more appropriate name for this delicious beverage already??**

Ingredients for Brownies (will depend on brand purchased):
I bought Ghirardelli Double Chocolate 
  •  1 egg
  • 1/3 cup vegetable oil
  • Recipe on box calls for 1/4 cup water, but instead use 1/2 cup Guinness
Ingredients for Cream Cheese Swirl (same from A Spicy Perspective):
  • 8 oz cream cheese softened
  • 1/3 cup sugar
  • 1 egg
  • 1/4 cup Bailey's Irish Cream
 Ingredients for Jameson's Ganache:
  • 1 bar of dark chocolate
  • 1/2 shot of whiskey 
  • 1/4 cup heavy whipping cream
Directions:
Fresh from the oven
  1. Preheat oven to 325 (or whatever your boxed brownie mix suggests), and butter and prepare your brownie pan
  2. Stir together all the brownie mix ingredients in a medium mixing bowl and set aside.
  3. In your stand mixer fitted with the paddle attachment, cream the softened cream cheese and sugar. Add the egg and Bailey's (mix until completely smooth and incorporated).
  4. Pour 1/2 of brownie mix into prepared pan.
  5. Drizzle cream cheese on top
  6. Pour the rest of the brownie mix into the pan and use a spatula to "swirl" the ingredients (do not over mix).
  7. Bake for 30 minutes or until inserted tooth pick comes out clean.
  8. While brownies are baking make the ganache.
  9. With ganache
    1. In a double boiler melt together the baking bar and heavy cream, add the whiskey and stir until completely incorporated. 
  10. After brownies are cooled pour on the ganache (I made them last minute because I wasn't feeling well, so I popped them into the deep freezer for about 10 minutes to allow the ganache to set before cutting the brownies).
 Serve with your favorite Irish Coffee and enjoy!

the tasty beverage


Monday, February 18, 2013

One Smart Mini Cookie

I am beyond excited about my newest purchase, and I had to share! A friend of mine found the most adorable graphic t-shirt at The Children's Place, and it had Doodle Bug's name ALL OVER IT! I loved this little shirt so much that I immediately purchased it in three different sizes (24 months, 2T, and 3T). If I were not such a thrifty lady I probably would have purchased it in Every Single Size they offered. Okay, enough hype...

 Drum roll please.............................................................................................................
...
...
......
..........
..............
....................
.........................


I mean, come on, right?!?! How could I pass this up? I certainly hope she likes the shirt... she will definitely get her wears worth. :)

So excited for it to come in the mail! Will post pictures in action when the shirts arrive! My favorite part is that there is milk on the front :) LOVE, L-O-V-E, L.O.V.E.

Tuesday, January 29, 2013

AP Our Way: Birth Bonding

This will probably be my most difficult post on AP. I was so determined to bond with Doodle Bug after birth and establish our breastfeeding relationship that I completely ignored my body and it's ability to birth a baby without modern medical intervention. In true first time mom form.... I PANICKED, and Doodle Bug was soon evicted at 39 weeks 5 days.

I was told at my 36 week appointment by my OB/GYN that I had a "narrow pubic arch" and that my baby might be too big to fit through my pelvis by the time I reached full term. These words scared me... I had read the research and was concerned about failed labor resulting in a Cesarean section. I was terrified that this would happen to me. What I was most afraid of was that by attempting labor and failing, I might jeopardize a strong nursing relationship. I continued to go to my weekly appointments, and each time I was told the same thing... only now it was added that, "baby has not dropped,"  "your pelvis has not spread," "Your placenta is prematurely aged." I was told that I could "attempt" a vaginal delivery, but it would most likely end in failed labor and emergency c-section. I even brought my husband to the final appointment just to make sure I wasn't overreacting-- he also became nervous. We weighed the options, and quickly scheduled the c-section.

We had no close friends with kids, and neither of us really knew what to expect when it came to birth.  We took a birthing class at our local hospital, bought tennis balls, packed a bag, but had no real idea of what might actually happen. I used to be the "just stick that needle in my back" woman. I have suffered with chronic migraines since I was 15, so I know endurance and pain. I always thought, "why would I want to willingly put myself through that much pain when I already experience pain on a regular basis? If there is modern medicine to spare me the pain, then sign me up!" Oh how the times have changed... I WISH I had started this blog when I first became pregnant... the transformation to mom has been such a magical adventure.

I posted a picture of my baby belly a few days before eviction on my FB listing the number of days I had left... I'm not going to lie- when a few FB friends saw that I was having a section-- they offered their advice, but I was so convinced by my own fears that I ignored it. I honestly didn't think I was the mom that scheduled their c-section. I thought, not it's not "scheduled," but suggested by my doctor.

The C-Section was scheduled for 7:30 on the morning of July 7th. We arrived at the hospital and were kindly met by the doctor. We were prepped and anxiously awaiting the birth of our little girl. 7:37 AM. She was out- 7 lbs 3 ounces (not quite the big baby that was projected). She was healthy... and the weight of the world was on my shoulders.  I am a mother. I am her mother. She is my daughter. What will the rest of my life be like? Am I going to be able to take on such an enormous task of raising a loving, kind, well-adjusted, respectful, and moral daughter? They handed her to me and it was hard to support her weight. I was lying there feeling helpless-- I couldn't hold her, I couldn't snuggle. All I wanted to do was nurse her, but also get someone to take her from me because it was too hard to hold her--- the numbing sensations were creeping up my arms and making them tingle. Daddy took Doodle Bug to the nursery to get cleaned up, and my insides were put back in order and my abdomen stapled. If you look at the pictures I look more bonded with her while she is still in me than I do after the c-section. It happened so fast my mind didn't have time to adjust to my new role as mother!

I was wheeled into recovery and Daddy and Doodle quickly returned. The recovery nurses were amazing-- they gave me tips for nursing, helped me do skin to skin, told me "just push through these first two weeks and I promise all will be fine." I used that mantra to keep my spirits up and force myself to get out of bed, walk around the hospital, take a shower, etc.

The Lactation Consultants were fantastic as well, and I was able to have bonding time with my little girl. One woman joked that I needed to give my daughter a pacifier, because every time she came to check on us she was nursing. I just smiled and kept right on nursing. She wanted to be next to me... and I was eager and willing to oblige. We were able to establish a strong nursing relationship-- one that is still going strong 18 months later. But, I felt like something was missing... I was anxious and out of sorts due to all the medication I had to take. The anxiety was crippling, and it was so out of character for me that I didn't know how to respond. I thought I was failing as a mother, and as if having a newborn isn't hard enough... I was recovering from major abdominal surgery!

Now, reflecting on my experiences, I am at peace with my decision to schedule my c-section. I wasn't at peace with this for quite a few months after my daughter was born (which resulted in a nasty case of PPA & PPD), but now that I see that she is truly healthy and happy I have no regrets. I have learned from my uneducated "mistakes", and my knowledge of birth and birth options has vastly expanded.

Hopefully one day (in a few years God-willing) with #2 I can post an entirely different blog about birth bonding. One where baby is born peacefully in an environment surrounded by love and serenity... not blue curtains and scalpels. I am excited by the possibility of having a VBAC one day... if that day comes I will share my experience, and I'm hoping I can put my new birth education to work. Hypnobabies, water birth, placenta encapsulation, delayed cord clamping... the whole works. Yes, you read that correctly Placenta Encapsulation... we are mammals after all. ;)

Sunday, January 27, 2013

Attachment Parenting: Our Way

Awhile back I wrote a blog post about preparing for baby while not breaking the bank where mentioned that we follow many of the principles of Attachment Parenting that are outlined by Dr. Sears. We pick and choose what works for us and our family and just roll with it. Due to our beliefs we often get slack from some of our friends and family members. People are under the common misconception that AP is some new-age-hippie-cultish phenomenon that strong arms women into attending to their child's every need. In fact, it is quite the opposite- women are encouraged to listen to their bodies and the bodies of their children, and by listening and being responsive, a child's basic needs can be quickly and lovingly met. AP is natural; it's as old as time, and it is not interpreted the same way for every family, or even every child. AP means you are lovingly attentive and responsive. It does NOT mean you spoil your child. It does NOT mean you hinder your child's independence. AP encourages you to embrace your infants dependence, and nurture your toddler to promote a strong sense of independence.

As AP style parents we take each day as it comes, and embrace each opportunity to grow into a loving and supportive little family. We learn from our daughter, and as time passes we continue to follow her cues. We don't have the "secret" to successful parenting. We aren't perfect. We just do what we feel comes naturally to us and just go with the flow...

I've decided that I will do a post on each of these "tools" and highlight how we've made them work for our family. Overall, the beauty of parenting is that it is personal to you and your family unit. You get to pick and choose what works best in your home. Many people give unsolicited parenting advice; Please do not misconstrue my posts for "advice"... I am merely describing what has worked for us so far. :)

I will post in the order outlined by Dr. Sears, but tried and tested by millions of women since the dawn of time... You know Eve nursed those babies and wrapped them on her back. 

The 7 B's of AP, what Sears refers to as "Attachment Tools" are:
  1. Birth Bonding
  2. Breastfeeding
  3. Babywearing
  4. Bedding close to baby
  5. Belief in the language of your baby's cry
  6. Beware the baby trainers
  7. Balance in your family
**DISCLAIMER: After publishing this blog post, One Smart Cookie summoned mother earth by calling on the spirits of the four winds while chanting around a fire and nursing her toddler in a woven wrap**

Wednesday, January 23, 2013

Baking up a Storm

 January has been a whirlwind to say the least. I came up with a bight idea over Christmas break (probably because I had the down time to think and process my ideas without also having to simultaneously instill an education in 100 middle schoolers) that I should start selling my lactation cookies. I have made numerous dozens of cookies over the past year and 1/2 for myself and others, and decided that it would be win-win to make a little extra money doing something I love (baking) while also promoting a cause I am passionate about (breastfeeding)!

I spent the last few days of Christmas break formatting and designing my business website, perfecting some of my recipes, and ordering pastry boxes and labels. I launched the Smart Cookies site and only a few days later I had my very first customer. I was proud of myself for making this dream of owning my personal "bakery" business a reality, but I was also anxious. Would she like the cookies? Would they help her to increase supply? Would she think I was a charlatan? I knew the cookies had given me the boost I needed when I returned to work and suffered with low supply. I knew they had helped countless friends establish adequate supply post birth. I knew they were yummy. I had just never SOLD any cookies before. I waited a day or two and was slightly discouraged because I was afraid the cookies had not worked for her. I went to school on a Friday and had a tough day with apathetic students unwilling to put the effort into achieving their own personal success and came home feeling defeated. I logged onto my facebook and was bombarded with messages and notifications. THE COOKIES WORKED.

GF & DF Smart Cookies
The woman who ordered my very first official Smart Cookies batch had success. She posted about my cookies in many different support groups and moms circles. It made my heart happy to hear that I was able to help her. I found a renewed confidence in myself, and I was ready to hit the kitchen hard in order to bring this success to other local moms.

Business is booming- in ways I never expected. People that I have helped by making cookies for in the past have started creeping out from the woodwork and promoting my business. I never expected this much support, and I feel blessed to be able to share my knowledge and product with other women.So far I have sold enough cookies to cover the cost of all my ingredients, packaging materials, and business cards with plenty to spare! I have made vegan cookies (a first for me) as well as dairy free-gluten free cookies (also a first).
Fan Fav: Letdown Madness

So, my blog does not have very many updates for January 2013, but my Kitchen Aid stand mixer has seen her fair share of baking in the past few months. Proficiency, I have found, is key. Next weekend I will have a baker's organizational day where I will measure out all my dry ingredients and bag them up by the dozen so I can quickly whip up a batch when one is ordered.

I love the feeling of personal success I have found in baking. It brings joy to my life- that is multiplied with each new batch of cookies fresh from the oven.

Tuesday, January 1, 2013

Vita-Mixin' it up

The husband and I decided to gift ourselves a bit early this year when Amazon had an unbelievable, jaw-dropping, nonnegotiable, kick-ass deal on the VITAMIX. We have been lusting after one of these for awhile, let's be honest-- YEARS! We are both teachers and have a child, so we always thought there was no possible way we could ever justify sending a small fortune ($600) on a blender. But, it is so much more than a blender... you can make just about anything in the Vitamix-- soups, healthy smoothiesMARGARITAS (can I get a "Yes, please!"?), nut butters, ice cream, dips, flour... the possibilities are endless. So, when I saw that the blender of our dreams was on sale for 40% off... I just HAD to buy it, and boy are we glad I did!

So, why haven't I been blogging over my Christmas break? Because we have been too busy cranking out food using our fun new toy and traveling to visit family!

We received our beautiful package in the mail on Christmas Eve, and left town to visit family on the 26th. We returned from NC on the 30th... and yet we still managed to create all this yumminess:

images from Vitamix.com

What we have made using recipes from Vitamix:
Thai Pumpkin Soup
Spinach Artichoke Dip (2x because it was so darn good the first time!)
Whole Fruit Margaritas-- absolutely delicious
Peanut Butter
assorted fruit smoothies