Sunday, December 23, 2012

Vodka Infusion... take two

What to get guy friends for Christmas other than booze? I mean really?? I can't just gift a bottle of liquor... The crafty side of me just cringes at the thought of that. So... the husband and I decided to give it a kick. We read that infused vodkas are really easy to make... so a few months back we gave it a shot. We both like sweet and spicy (which is why we love Thai food), so we decided to make a crushed red pepper flake and blackberry infused vodka. Sounds great, right? Well, the math teacher of the pair (not to name names or anything) thought the directions said to allow the flavors to absorb for 2 weeks... um, no, they were only supposed to infuse for 2 DAYS! The infused vodka is still in our freezer... and we only bust it out for the rare occasion of a bloody mary. Some days we volunteer ourselves for immediate infliction of pain by just curiously allowing the liquid to hit our lips once again (it MUST NOT be as spicy as I remember...) It always is.

Our vodka fail was a joke among our friends, so we thought we would redeem ourselves with a little Christmas inspired infusion.

Vodka infusion Take Two...
Candy Cane Vodka

We bought a one liter bottle of Smirnoff (you don't want to go too cheap because the burn of the vodka will mask the flavor that you are trying to infuse). Next time... because this one WAS successful (wahoo), we will spring for an even pricier bottle. We have class (most of time... we do live on the Westside afterall).

One bottle was enough vodka to fill two pint size mason jars.

We bought one box of peppermint candy canes and used all but two in the infusion (saved two for packaging-- this wasn't even my idea... I think my craftiness is starting to rub off).

We took about two or so shots out of the bottle so that we would have enough room to add the candy canes. Just enough to make a stiff screw driver for the mixologists. We added the candy canes and put the bottle in the refrigerator for two days. Every time we opened the refrigerator to get something we would give the bottle a little shake. The candy canes dissolved after about a day, so we knew it was ready to be packaged.

I had some craft paper left over from when I packaged the Homemade Hot Cocoa, so I busted out the Cuttlebug machine and used the largest circle die to make the labels for the lids. I used mod podge to adhere, hemp to adorn decorative candy cane and gift tag, and voilĂ ... a booze gift that One Smart Cookie is proud to give.

The boys that were on the receiving end of this vodka infusion were also my taste testers for the Homemade Hot Cocoa Mix. My husband and I had about 1 shot of candy cane vodka left over, so he made a Hot Cocoa with Candy Cane Vodka... let's just say he finished the cup in about two minutes flat.

Score two for the O'Briens... DIY Christmas success!

Tuesday, December 18, 2012

It's a DIY Christmas

It's something about the season of Christmas, and the thick cloud of holiday cheer, that beckons my crafty and creative alter-ego to surface and shine for the month of December. Many nights (like tonight) I end up staying up late to organize and devise plans for my Christmas DIY gifts. I walk through the crafting stores consumed by my eagerness to get to work, and overwhelmed by endless possibilities that await on each aisle. I am indecisive enough as it is... give me 500 different colors and patterns of craft paper to choose from and I'm done for!

I love to create, and I love to gift my creations. I have always preferred to give and receive thoughtful homemade items... and I can remember being enveloped by this urge as a child as well. I love the consideration and time that goes into the art of the home good... thinking about how and what to make is the most fun.

Last year because money was a little tight I decided to make all the women in our family and my 6th grade room moms scented sugar scrubs. This year it's Homemade Hot Cocoa Mix!

I took the idea from Pennies on a Platter's Hot Cocoa mix (originally The Brown Eyed Baker's Homemade Hot Cocoa Mix), and then I just revised it based on what I had available in my pantry.

This recipe is SUPER easy to make-- all you need is a powerful food processor or blender and some canning jars for your finished product.

Ingredients:
  • 3 cups dry milk powder
  • 2 cups powdered sugar
  • 1 cup unsweetened dark chocolate cocoa powder
  • 1 1/2 cups white chocolate chips
  • 1/2 cup chocolate chips
  • 1/4 teaspoon salt
Directions:
  1. Stir all ingredients together in a large mixing bowl
  2. Blend in a food processor in small batches until all is combined and chocolate is finely ground.
  3. Transfer into small air tight canning jars  
    1.  I decorated my canning jars with Christmas craft paper and mod podge (gotta love the mod podge!), instructions, and a ribbon with gift tag
Yield: about 20 servings 
Hot Cocoa, Anyone?
Good for up to three months.

To make:  Mix 1/3 cup of cocoa mix with 1 cup warm milk. Enjoy :)

Monday, December 17, 2012

It's the most wonderful time of the year


The Christmas tree is decorated, the stockings are hung, the house smells of ginger and cinnamon, the ceramic light tree glows softly in the background, the dog scratches at the back door because it is too cold for a Whippet to stay outside, Doodle Bug, mom, and dad cuddle close to keep warm and sneak extra snuggles, checking the mail becomes the daily excitement... it is Christmas... and we are so blessed to have what we have, and possess no want for anything more.
Merry Christmas from our family to yours!

Saturday, November 24, 2012

Cabernet Cranberry Sauce

Blasphemy: I do not like Thanksgiving turkey- at all. I am a ham and sides gal... have been my whole life, and cranberry sauce from a can?? That does NOTHING to improve my odds of enjoying a piece of lovingly roasted and hand carved turkey. I do not relish in the prospects of next day leftover turkey sandwiches either-- I know I am a freak! All of that changed this year... and we can give all credit to- the. best. cranberry. sauce. ever. I didn't even think I liked loved cranberry sauce, but I do! This recipe makes a TON, but can stay fresh in the refrigerator for up to two months. We were going to THREE Thanksgivings, so we made this larger batch... you could easily half  or quarter the recipe to fit your own needs.

Ingredients:
  • 1 1/4 cup granulated sugar
  • 1 cup Cabernet 
  • zest of one tangerine
  • juice of one tangering
  • 12 ounce package of cranberries 
  • 1 cinnamon stick
  • 1/2 teaspoon freshly grated ginger root (or more-- add based on your own taste)
Directions: 
  1. In a medium sauce pan on medium low heat, bring sugar and cabernet to a boil (stir constantly).
  2. Once the sugar mixture has come to a boil, add cranberries, cinnamon stick, tangerine zest, tangerine juice, and grated ginger. 
  3. Partially cover and allow to reduce for 10 minutes or so. Skins of cranberries will burst when they are done.
Serve warm or cold! I have eaten it three times in the past two days-- with TURKEY! Yum :)

Thursday, November 22, 2012

Cranberry White Chocolate Bread Pudding

While I am waiting for noon to come around so we can head across the street to my MIL's house for Thanksgiving #1, I thought I would share a recipe for a tasty little treat my husband and I whipped up this morning. My husband LOVES bread pudding, but I was not a fan until last year when he made Paula Deen's "The Best Bread Pudding".  As you can imagine, since it is a Paula Deen recipe, the amount of butter in this recipe will make your arteries tremble in fear. This year we decided to give her recipe a Thanksgiving themed improvement makeover.

Cranberry White Chocolate Bread Pudding with a Cranberry Brandy Drizzle

Ingredients:
  • 2 cups granulated sugar
  • 5 beaten large eggs
  • 2 cups milk
  • 2 teaspoons pure vanilla extract
  • 3 cups cubed Italian bread (cube the night before and allow to stale overnight)
  • 1/2 cup packed light brown sugar
  • 1/4 cup (1/2 stick) softened butter
  • 1 cup chopped walnuts
  • 3/4 12 ounce bag of fresh cranberries
  • 6 ounces white chocolate chips
Ingredients for the drizzle:
  • 1 cup granulated sugar
  • 1 egg
  • 1 stick butter
  • 2 teaspoons pure vanilla extract
  • 1/4 cup brandy
  • leftover 1/4 bag of cranberries 
Directions:
  1. Preheat oven to 350, and grease and flour pan(s). We used two square pans (8x8 and 6x6) because we are taking them to two separate dinners.
  2. Mix together granulated sugar, milk, and eggs in a large bowl. Add vanilla. 
  3. Pour egg mixture over cubed bread; add cranberries and white chocolate and let sit for 10 minutes. 
  4. In a small bowl crumble together softened butter, brown sugar, and chopped walnuts.
  5. Pour bread mixture into prepared pan(s).
  6. Sprinkle brown sugar crumble over the top, and bake for 35-45 minutes. 
Directions for Drizzle:
  1.  Whisk together melted butter, granulated sugar, egg, and vanilla. 
  2. Heat mixture in a sauce pan (stirring constantly) over medium heat until sugar is melted. 
  3. Add cranberries and brandy and cook until the skins of the cranberries pop.
  4. Transfer mixture into a blender, and pulse until all ingredients are incorporated. 
  5. Drizzle over top of bread pudding for decoration. We also put the remainder in a squeeze bottle to allow each person to add the amount of drizzle they desire. 
Serve warm or cold!

Wednesday, November 21, 2012

It's beginning to smell a lot like Thanksgiving

The Thanksgiving baking commences... This year we will be celebrating two Thanksgivings on Thanksgiving day... let's just say that even if our pants don't agree, we have a great deal to be thankful for this year. My husband and I are both incredibly lucky to have our parents and many family members living in town, and this year we are extra blessed because my sisters are going to be in town as well. My MIL is usually very kind and invites my small family to join hers, but this year there will be too many Lynskeys to fit in the O'Brien home! So... two Thanksgivings it will have to be!

Our mothers are in charge of the majority of the cooking, but I have volunteered to bring the dessert. One dessert I will bring is a Pumpkin Gingerbread Trifle. Here is how I made it-- very simple and semi-homemade.

Bake two boxes of gingerbread and set aside to cool. Once cool, break the gingerbread into crumbles.

Prepare one large box of vanilla instant pudding (takes 3 cups of milk) and let sit in the refrigerator to firm up. Once pudding is set, mix in one 29 ounce can of pumpkin puree. Add 3 teaspoons cinnamon, 1 teaspoon ground ginger, 1/2 teaspoon ground cloves, 1/2 teaspoon ground nutmeg, and 1 teaspoon all spice and stir together. Refrigerate mixture until ready to assemble trifle.

Evenly layer half of the gingerbread, then 1/2 of the pudding, and then 1/2 of the cool whip (repeat). Garnished with chopped pecans and a heart made of cranberries.

Tuesday, November 6, 2012

Thanksgiving Desserts, oh the choices!

Okay, so I MAY be on a personal sabbatical from the kitchen and my trusty stand mixer, but that doesn't keep me off Pinterest, or stop me from gathering ideas for Thanksgiving desserts. My MIL will be cooking the dinner at her house, and then everyone will walk across the street to our home for dessert. I think it's safe to say that though I can bake, I am NO cook.

 My husband loves to cook, and that man can cook circles around me! This is the same man that ate pizza every night for dinner during his first few years of teaching and bachelor living. He ate off paper plates and drank from solo cups because he didn't want to break out the dishes and turn on the sink. How did he transform into a kitchen mastermind? Well all I can say is that one wonderful aspect of Doodle Bug's constant fussiness during the hours of 5-9 PM each night was that the husband had to learn how to prepare the meals. I was stuck on the couch with a nursling that would only calm down when I fed her. He began with making curries (a staple in our home), and slowly started to branch out to pastas with homemade sauces, stuffed squash, roasted garlic asparagus, etc. I have become one lucky lady... and 16 months later I still love to sit back and watch him create new dishes.

So, today my mission was securing Thanksgiving desserts to please each palate. My husband, SIL, and MIL LOVE dark chocolate, my FIL and myself prefer white chocolate, and of course... PUMPKIN needs to make an appearance!

Narrowed down choices include:
  1. Pumpkin Gingerbread Trifle (Gingerbread cake, pumpkin butterscotch pudding, toffee, whipped cream)
  2. Cranberry White Chocolate Bread Pudding (WOW!)
  3.  Dark Chocolate Cupcakes with Pumpkin Pie Frosting
I may not want to bake just yet, but MAN-- these sound delicious!

Monday, November 5, 2012

Post Bake Sale Baking Haitus

Last week I spent 6 days in Virginia visiting my family. My Grandmother passed away on Thursday the 25th, and I flew out with Doodle Bug and my dad on Friday the 26th to celebrate her life with my mom's family. While I was in Courtland (a tiny town with the population of about 2,000 at most) I was able to flip through some of my Grandmother's cookbooks. I came home with many different southern recipes and my Great-Grandmother's recipe for caramel icing (I can't wait to try). My Grandfather gave me a rolling pin and one of my Grandmother's 8x8 baking dishes as well. I know that every time I roll out my cookies she will be smiling down at me.

When I returned to work on November 1st, I knew I had my work cut out for me. I had grading, recording, and organizing of papers that would take days to complete. I was overwhelmed before the first bell even rang. All of my anxiety quickly melted away as my 6th graders began to enter the classroom. They smiled, ran over, and hugged me (the real genuine kind). I felt so blessed to have such a wonderful class to come "home" to. They made me card,s and throughout the day different students would randomly place them on my desk. I think they must have known that I needed their love and encouragement to get through my first day back in one piece. This is the kind of class that career teachers will teach for 20 years just waiting for. It's the kind of class that one dreams of having... and I am beyond appreciative of them.

After returning to school on Thursday, I had to rush home and start up a baking storm. I signed up in September to be the co-chair of our MOMS (Ministry of Mothers Sharing) Group Bake Sale. We needed to raise close to $1,000 in one weekend in order to obtain our goal of buying Christmas gifts for multiple children from two local charities. I offered to bake for many different people and was planning to bake all the items over the course of a week. Considering I had spent my baking week in Virginia, I knew I had to kick in full gear in order to complete the task at hand. I stayed up until midnight on Thursday night baking S'mores Bars, Cinnamon Walnut Oat Bars, Mint Chocolate Chip Cookies, Brownie Cookies, Lemon Sugar Cookies, and Cinnamon Walnut Cookies.

On Friday after school I had to rush home to bake it up a little more. I made White Chocolate Macadamia Nut Cookies, and then went to my friend's home (who has the most AMAZING DOUBLE OVEN) to work with other MOMS friends to finish our baking. We made bread, muffins, pies, cookies, mini pies, etc. She also had these little nifty contraptions that made mini pies, cake pops, and muffins!

Over the course of the weekend Masses at church we were able to sell about $800 with of baked goods. We were happy to come so close to our goal and were very impressed with the generosity of our fellow parishioners. We know now that next time we need to bake more pies, bread, and larger cakes-- we were blown away by how many requests there were for these items.

Okay, so enough rambling... here's a recipe that I tried for the first time during my baking frenzy. After this past weekend the whisk, stand mixer, my recipe books are locked in the pantry for at least a week... I need to regain a little sanity and stop the dreams of cupcakes that overflow their wrappers... Darn muffin tops-- We women and bakers hate them for SO many reasons.


Cinnamon Walnut Oat Bars
I got the base of  the recipe off the back of the bag of cinnamon chips with a little One Smart Cookie rendition
Ingredients:
  • 1 cup butter softened 
  • 1 cup packed light brown sugar
  • 1/3 cup granulated sugar
  • 2 large eggs
  • 1 1/2 teaspoon vanilla
  • 1 1/2 cups all purpose flour
  • 1 teaspoon baking soda
  • 1/2 teaspoon pumpkin pie spice
  • 1 dash cinnamon 
  • 2 cups rolled oats
  • 3/4 cup raisins and craisins mixed
  • 1/2 cup chopped walnuts
  • 1 package 12 oz Hershey's cinnamon chips
Directions:
  1. Preheat oven to 350 and lightly grease and flour a 9x11 inch pan.
  2. In a stand mixer fitted with the paddle attachment, cream butter and sugars.
  3. Add eggs one at a time mixing well between each addition. 
  4. Add vanilla and mix until all ingredients are incorporated. 
  5. In a large mixing bowl sift together flour, baking soda, cinnamon, and pp spice.
  6. Slowly add dry ingredients to wet mixing well between each addition.
  7. Stir in cinnamon chips, walnuts, and raisins/crasins. 
  8. Add oats last.
  9. Bake for 25 minutes or until inserted tooth pick comes out clean.
These are SUPER yummy! Enjoy :)

Wednesday, October 24, 2012

Jalapeno Jack Cornbread

Today we decided that since the weather forecast predicted less than hellish temperatures in Florida, it was finally time to bust out the crock pot and dust off the chili recipes. We set it all up this morning and went on our way to work. I decided on the way home from work that nothing tastes better with chili than cornbread, so I pulled out my corn meal and got to work.

We LOVE spicy foods in our house, so jalapeno was a necessary ingredient. The inspiration came from my the supervising teacher during my teaching internship in Georgia in 2008. She was such an amazing cook-- she always made sure I was fed, and fed well.

Having grown up in the South, I have had my fair share of cornbread, but I will go out on a limb here to make the claim that this is BY FAR the best damn cornbread I have ever had!

Ingredients:
  •   1 medium size jalapeno (remove seeds and chop finely)
  • 1 1/4 cups all purpose flour
  • 3/4 cup corn meal
  • 1/4 cup sugar
  • 2 teaspoons baking powder
  • 1/2 teaspoon salt
  • 1/8 teaspoon cracked black pepper
  • 1/8 teaspoon cayenne pepper
  • 1/8 teaspoon paprika
  • 1/2 cup whole milk
  • 1/2 cup shaken buttermilk
  • 1/4 cup vegetable oil
  • 1 egg
  • 1 1/2 cup pepper jack cheese (grated) 
 Directions:
  1. Preheat oven to 400 and seed and dice up jalapeno.
  2. In a large mixing bowl combine flour, corn meal, sugar, baking powder, salt, pepper, cayenne, paprika, jalapeno, and grated cheese. 
  3. In a small mixing bowl whisk together milk, buttermilk, oil, and egg.
  4. Pour liquid mixture into dry mixture and stir together (just until dry ingredients are moist).
  5. Spray muffin tins and fill 3/4 full.
  6. Bake for 15-18 minutes or until inserted toothpick comes out clean.
Serve warm and ENJOY!

Monday, October 22, 2012

Crock Pot Applesauce

Completed step #3
Doodle Bug loves applesauce, and I love to bake with applesauce as a replacement for oil. I figured, if I am baking with applesauce in order to have a healthier end result, I better start making my own applesauce so I know the exact ingredients. It's really not as difficult as you might think to make your own applesauce. All you need is a crock pot, and you can start the applesauce making wheels in motion.

Ingredients:
  • 4 large apples (I like to use organic when I am cooking for Doodle Bug)
  • fresh lemon juice
  • 1 cinnamon stick
  • 1 teaspoon butter
  • 1/4 cup water
Directions:
  1. Peel and core all apples.
  2. Put apples in crock pot with cinnamon stick, water, lemon juice (a few squirts), and diced up butter.
  3. Cook on high for 1 hour and 30 minutes- 2 hours.
  4. Pulse cooked mixture in food processor and let cool. 
  5. Store in large mason jar in refrigerator.  


Sunday, October 21, 2012

Pumpkin Spiced Waffles

post waffle trip to the pumpkin patch!
It must have been that pumpkin spice latte from Starbucks that started me on this pumpkin kick which is spiraling out of control. Until last month I had never even attempted any recipes with pumpkin in them. Now, I. Just. Can't. Stop. It doesn't hurt that Doodle Bug LOVES pumpkin. Her Grammy and Grampy take her to Panera often for Pumpkin Muffies (her addiction to Panera's Pumpkin Muffies is what started me on my muffin baking binge).

So, what did I decide to make this morning for breakfast? Pumpkin Spice Waffles. These are SUPER easy to make... and VERY yummy-- complete with Doodle Bug's seal of approval.

The batter makes up to 6 servings. We used 1/2 of the batter and covered the rest with cling wrap. It will stay good in the refrigerator for up to one week. You just need to stir it up again really well before using.

Ingredients:
  • 2 eggs
  • 2 cups all purpose flour
  • 1 cup milk
  • 3/4 cup buttermilk (just because I had it in the refrigerator and needed to use it-- if you do not have buttermilk you can use regular milk)
  • 1/2 cup vegetable oil
  • 1 Tablespoon sugar
  • 4 teaspoons baking powder
  • 1/4 teaspoon salt
  • 1/2 teaspoon vanilla
  • 2 Tablespoons or more of pureed pumpkin
  • 1/2 teaspoon Pumpkin Pie Spice
Directions:
  1. Plug in waffle iron so it can get nice and hot.
  2. In stand mixer beat eggs until they are light and fluffy. Add milk, buttermilk, vanilla, oil, sugar, and pumpkin and mix together.
  3. In a small mixing bowl, sift together flour, baking powder, salt, and pumpkin pie spice.
  4. Slowly add dry ingredients to wet-- mixing until all ingredients are incorporated. 
  5. Cook according to the directions on your waffle iron.  
Tuckered out and snuggling with her baby pumpkin
Enjoy! We did!

Saturday, October 20, 2012

One Trifling Fool

My parents are directors of a local youth ministry, and they are having a fundraiser this weekend for their annual ski trip. Mom likes to sign me up to make desserts, so this time I made a Chocolate-Strawberry-Trifle. I love to make this recipe for many reasons.
  1. It gives me a reason to make my husband's favorite chocolate cake from Barefoot Contessa.
  2. I get to layer all the ingredients in the trifle bowl (something about this is calming to me- it's like a challenge each and every time I make a trifle)
  3. I get to experiment with different toppings and textures. Let my creative hair down for a bit :)
This time for the trifle guts I chose: chocolate cake, strawberries and raspberries, Cool Whip, and chocolate pudding.

The first thing that I do is bake the cake. The Barefoot Contessa recipe will make two 9 inch round layers. I usually bake one 9 inch round and then make about 15-16 cupcakes with the remaining batter. The cupcakes only need to bake for about 15 minutes (or until inserted toothpick comes out clean).

While the cake is cooling (needs to be cooled completely) I cut up the strawberries (one whole package) and sprinkle them with about a Tablespoon of white sugar. I let the strawberries sit in the sugar mixture for a few hours in the refrigerator.

Once the cake has cooled, I break it up into 1 inch pieces. I use two bowls to separate the pieces of cake (this way I know the layers will be even in the trifle). I always have a little bit of the layer cake left (enough for a taste test for the hubby).

Next I make the pudding. I buy two large boxes of instant pudding and prepare it just as the box indicates. Because I am making a double batch (two boxes), I mix the pudding on low (to avoid splash). Heads up--this much pudding calls for 6 cups of milk.

While the pudding is setting in the refrigerator (takes about 5 minutes), I begin to layer the ingredients. I always start with a layer of strawberries on the bottom and around the bottom of the trifle bowl. I then pour 1/2 of the pudding mixture inside the ring of strawberries. Next I add the chunks of chocolate cake. On top of the chocolate cake I spread a thin layer of cool whip. On top of the Cool Whip I add another layer of strawberries (and a decorative ring against the trifle bowl). On top of strawberries I add the rest of the pudding mixture. On top of pudding I add cake. On top of cake I add Cool Whip. For decoration I add another ring of sliced strawberries. I also add four halved strawberries in the center with a raspberry. I cover the trifle with cling wrap and refrigerate until time to serve.

Scoop and enjoy!

I had a little extra of all of the ingredients this time... so I made four small ramekins of personal size trifles.

Monday, October 15, 2012

Baby on a Budget

Doodle Bug's 1st picture
This week marks the 2 years since Doodle Bug has entered our lives. Weeks post conception my husband and I began to skimp, save, and pinch pennies knowing we wanted to make sure we had everything we needed for our little bug. We were thrifty-- bought big ticket items little bits at a time, shopped the sales, and knew that 2nd hand could be just as nice (especially on the wallet) as full retail items. We had a trip in the works for the summer of 2011-- IRELAND! Due to the nature of this European adventure, we had already set aside enough money to pay for our flights. We later joked that we should have named our little girl Ireland-- once we confirmed the positive pregnancy test with an ultrasound and heart beat, our Ireland fund was instantly transformed into baby O fund.

Being first time parents, we had NO clue what we were getting ourselves into. We were not sure what baby items were "necessities" and which items were "excessive." Not only were we first time parents, but we were also the first of our friends to take the plunge into the icy, uncharted waters of parenting. We had a bad case of need vs. want. What will baby need? What will baby want? What we soon realized in the weeks/ months post birth was that there are very few items that a baby NEEDS. Its needs are met through love and attachment to mom and dad. I wish I had known more then, but I guess that's what parenting is- just a giant learning curve... and just when you think you have the hang of it, you are thrown a curve ball!

Many of my friends are starting families soon, or at least thinking of starting families soon, and many asked me which items I would recommend. I figured I'd make a list of baby things that I felt were necessary vs baby items our family left completely neglected-- still unused 15 months later.

We take a very natural "organic" approach to parenting, and have been pleasantly surprised with the results. I guess if I had to label our parenting "style" we would fall under the umbrella of Attachment Parenting. We did what felt natural to us... and it wasn't until later that I realized we followed many of the principles of attachment parenting. The 7 Baby B's of Attachment Parenting (outlined by Dr. Sears) encourages: Birth bonding, breastfeeding, babywearing, bedding close to baby (co-sleeping), be-wearing of "baby trainers", and balance in your personal, and family life. I will write a post soon about which of the 7 B's we embrace-- and how this works for our family.

The beauty of parenting is that you get to pick and choose what works for you, your baby, and your family unit. Many of the baby "items" on my list/ not on my list have to do with our parenting choices (not to be confused with the idea of-- what we do is right, and what you do is wrong!) We do what is "right" based on the current needs of our family, ie what works for us.

With that disclaimer of sorts, let me just state that that it's amazing when I reflect on how many items and baby accessories our modern American society convinces us that our babies "need" in order to develop healthily and happily. Many products I deemed to be synonymous with the term "baby" are not even used by doodle bug (now or ever). We are not perfect as parents (who can be??), and we are always evolving and changing. The philosophy that has done us well is to take each day as it comes, laugh often, and love fully.

List of top 15 items that I'm glad I bought on the cheap/ registered for:
  1. A quality breast pump and pump accessories. I used that baby til it DIED! I pumped on my plannings everyday from November 1st- June 1st.
  2. Nursing tank tops-- I kept putting off buying them, but by 6-8 months I had one in just about every color. Convenient, alternative to nursing bras, modest with nursing in public... really just an all around winner.
  3. Sleepy Wrap (now called Boba Wrap) This was a gift from a co-worker who had 7 children--- you read that right SEVEN! She said it was a life saver, and she was right! Doodle Bug LOVED to be worn... and I loved to snuggle her close. 
  4. BabyHawk Mei Tai Carrier Awesome gift given to me by my aunt and uncle :) Used all the time during her first 12 months.
  5. Pack-N-Play. We actually regisitered for two and were lucky enough to get both as gifts. Doodle Bug still uses them 15 months later-- on a daily basis. We keep them at multiple houses to ensure that she has a place to sleep no matter where we are... we are a family on the go-go-go, and she has adapted seamlessly to our busy lifestyle. 
  6. Craigslist changing table. Seriously-- this was a no-brainer. We use this all the time and were happy to find the $40 steal online. 
  7. Fisher Price Newborn/Infant Rock 'n Play Sleeper Doodle Bug slept in this for the first six months of life. It snuggles them in and is great for first time parents because you can take it with you all over the house. Also, I was so paranoid when she was a newborn (rocked some serious PPA) that I wanted her to sleep right next to me. I was afraid to co-sleep with her when she was a newborn, and for some reason I didn't like her bassinet. I liked her sleeping at an angle. Anyway-- for all these reasons I was stoked when my awesome in-laws showed up on my doorstep with this amazing contraption less than 30 minutes after I mentioned wanting one. It easily folds up and made many road trips with us in those first six months. 
  8. Diapers, Diapers, and more Diapers. Calling all diapers, butt creams, and wipes --- diapers of all kinds. We registered for all different brands- cheap, expensive, Eco friendly, not so Eco friendly. We registered and bought some cloth diapers as well for when I stayed home the first four months. Doing cloth diapers while at home on maternity leave with no pay did help to save money. Cloth diapers aren't as awful as it seems- especially with a breastfed baby (poops are water soluble-- and smell more like old popcorn than grown ass man poo).  I found some great deals on amazon and cloth diaper swap groups. GASP-- yes, we did buy lightly used cloth diapers. We didn't cloth diaper for long. Mostly because when I went back to work I didn't have the time or the energy. We seriously didn't have to spend a dime on diapers for the first 6 months of her life-- thank you registry!
  9. Jar of Coconut Oil. Used for many reasons-- a few of which for babies includes, but is not limited to: natural treatment for diaper rash and cradle cap. Oh, and cracked/sore nipples in the beginning.
  10. Umbrella Stroller- small, affordable, and easy to travel with. They are inexpensive, so you can buy one for each car!
  11. Car seats my mom was smart enough to encourage me to resister for more than just the infant seat, but the toddler seat as well. It was an awesome surprise to get BOTH as gifts from friends.
  12. Bath Insert I'm not referring to the large infant plastic tub thing. I'm talking about a little mesh seat that can be used in the kitchen sink. The large plastic tub that was given to us is in the attic-- never have been used.
  13. Boppy I used this multiple times every day for bug's first 12 months. I still  use it on occasion to feed her. When she was little I used it for feeding, tummy time, something to prop her up, and when I was exhausted and with out sleep-- a pillow.
  14. Playtex drop in bottles and liners when I went back to work I tried more bottles than I care to remember with little bug. Playtex dropins were finally the only ones she would take. 
  15. Newborn bouncer/ vibrating seat this was given to us as a hand me down, but if it hadn't been given to us I would have shelled out the money for it! Great place for baby to nap!
What I wish I hadn't registered for/ paid for/ items barely used or not used at all: 
What did I used to think of when I heard "baby"? Crib, pacifier, bib, bottle, formula, jars of baby food, cereal, etc. Not so much anymore ;)
  1. Crib- and all cribish accessories. This is the first thing I thought of buying-- when I thought "baby," I instantly associated "crib." This item we have found to be completely unnecessary. She has taken a total of two naps in her crib. I can at least take solace in the fact that I bought the crib second hand and only spent $100. 15 months later we are finally using the mattress-- we set up a Montessori style toddler room for her to play and nap in. I will devote a different post on how we did this and why. All in all, it has been awesome :)
  2. Pacifiers she was never interested, and I didn't overly encourage it. We had some latch issues in the first few weeks of her life, so I didn't want to introduce the pacifier because I was afraid she would have nipple confusion. 
  3. Big newborn bath tub this item is in the attic never having NEVER been used
  4. Bibs never once needed one
 Baby junk you are convinced you need, but really just completely worthless (to us at least):
  1. wipe warmer
  2. fancy stroller
  3. expensive glider/rocker
  4. outfits for every occasion- our bug was born in July- she wore onesies for the first few months of life.
  5. nail clippers- your teeth and a nail file work just fine (this is what bug's doctor told me)
  6. swaddling blankets (take the newborn ones from the hospital)-- these are free and you can take as many as you want.
  7. newborn shoes (really?? They aren't going anywhere fast)
  8. formula-- milk straight from the tap is better for baby and completely FREE! Plus it means no warming and preparing bottles in the middle of the night.
  9. Jars of baby food-- seriously! This is SO easy to make yourself- it saves money and is healthier! Baby Led Weaning is the way to go! I did very little purees, but when I did I made my own for 1/2 the cost and for much healthier. 
  10. really nice burp cloths- just buy a pack of cloth prefold diapers! I used the cloth diapers for burp cloths and spit up rags for the first 6 months or so.
Learned many a great lessons this first time around, and now I have to ask myself... What will I buy/ invest in next time that I didn't with doodle Bug?
  1. The only item I wish I had this time is an Ergo Baby Carrier. I borrowed one from a friend when we went to California this past summer-- it was so easy to use and comfy that I will just have to break down and buy one next time!
  2. I will spend some serious $$ on some birthing classes to try to prevent another c section. I'm thinking Bradley classes and possibly Hypnobabies as well.
  3. I will also shell out some money to see a Lactation Consultant directly post birth next ime to try to address latch issues before it becomes overly painful.
  4. Probably invest in a Doula and PP support as well. Those PP horomones are NO JOKE!
Snug as a bug in her Sleepy Wrap- best gift ever! This is the gift I now give to expecting moms :)

Wednesday, October 10, 2012

Grab and Go Oat Muffies

LOVE to experiment with toppings!
On a money saving kick and needing to find cheap, yummy, healthy, and quick morning snacks, I hit Pinterest hard until I found pictures and recipes that inspired me to kick it full gear in the kitchen. Cheap, yummy, healthy, and quick-- now that's a tall order to fill.  I found solace in two blogs KatieGrauke.com and Sugar-Free Mom. I took ideas from both recipes, and raided my stocked pantry and refrigerator for a few extra ingredients. The whole purpose of these muffies focused on using what we already had in our fridge/ pantry... hence no extra money spending! I encourage you to take the "Everything but the Kitchen Sink Challenge" as well :)

I LOVE that these oat muffies can be personalized with many different toppings, but what I love MORE than the toppings is that they can also double as lactation support muffins! Oats, dried fruit, flax, brewer's yeast... all of these boost milk supply!


Blueberry!


Ingredients:
  • 2 eggs
  • 1 teaspoon vanilla extract
  • 1 1/4 cup homemade applesauce (sugar-free mom calls for 2   cups-- all I had left of Doodle Bug's applesauce was 1 1/4 cup)
  • 1 mashed banana
  • 1/4 cup packed brown sugar (husband is allergic to artificial sweeteners/ substitutes)
  • 1/4 white sugar
  • 2 Tablespoons softened butter
  • 2 3/4 cups milk
  • 5 cups oats
  • 1/4 cup flax seed meal (we use the golden)
  • 1 Tablespoon cinnamon
  • 1 1/4 teaspoon All Spice
  • 2 Tablespoons baking powder
  • 1 teaspoon salt
  • 1 Tablespoon Brewer's Yeast

Directions:
  1. Preheat oven to 350.
  2. In a stand mixer (fitted with the paddle attachment), cream butter and white and brown sugar.
  3. Add eggs (one at a time), beat well after each egg
  4. Add vanilla, mashed banana, and applesauce and mix together
  5. In a large mixing bowl, stir together oats, brewer's yeast, flax, cinnamon, all spice, salt, and baking powder.
  6. Turn mixer on lowest speed and scoop (I use one of Doodle Bug's little cups) oat mixture into wet mixture. Mix only until all ingredients are incorporated. 
  7. Pour milk into mixture and stir to combine.
  8. Spray muffin tins and fill 3/4 full (I use a large cookie scoop).
  9. Add toppings as desired and bake for 30 minutes or until inserted toothpick comes out clean.
Yield: 30-31 muffins 
Toppings I used:

For Doodle Bug and mom:
  1. (16) I added frozen blueberries and dried cranberries to the mixture 
  2. (6) For a few of the muffins I added frozen blueberries and raspberries
For husband:
  1. (3) Dark chocolate, walnut, and coconut (left over from German Chocolate Cake
  2. (3) Dark Chocolate chunks on top with dried cranberries in the mixture
  3. (3) Peanut butter chips and walnuts added to the top 
TIP: When making these again I would use muffin liners- In the spirit of the challenge I didn't go buy them today, but next time I will-- would just make them easier to store/ freeze.

Monday, October 8, 2012

Lovin' From the Oven's S'mores Cookie Bars

I checked planners again this week for Bakery Club and 4 of my 26 students qualified. Many students forgot to write down ALL their tests and quizzes for the week which is why BC's numbers are down this go 'round.

I asked the kids what they wanted this time (usually they are quite direct), but this time they were a bit more adventurous. I think that this is due to that fact that I made a combo brownie/cookie last time that they LOVED! I told them I had been scouring Pintrest for something yummy and "different" for them to try. They were excited to hear all of my choices, and finally settled on S'mores Cookie Bars.

This recipe comes from Lovin' from the Oven. The kids practically drooled when they heard this choice. So, Lovin' from the Oven, I'll have you know that your recipes aren't just yummy looking, but 6th Grade approved as well. Let me tell ya-- it takes A LOT to impress these guys ;)

I followed her recipe almost exactly... I will include a few tips and tricks that I used as well.

Give these a go-- they are super easy and yummy!

Ingredients:
  • 1/2 cup unsalted butter room temperature (I'm a stickler for springing for "real and good" butter)
  • 1/4 cup packed light brown sugar
  • 1/2 cup white sugar
  • 1 large egg
  • 1 teaspoon vanilla extract
  • 1 1/3 cup all purpose flour
  • 3/4 cups graham cracker crumbs (you can make your own using a food processor, or you can buy the box of graham cracker crumbs in the baking aisle for about $1-$2 less)
  • 1 teaspoon baking powder
  • 1/4 teaspoon salt
  • pinch of all spice (just because I love it!)
  • 2 king size Hershey's chocolate bars
  • 1 1/2 cup marshmallow fluff
Directions:


  1. Butter and lightly flour 8x8 pan and set aside. Preheat oven to 350.
  2. In a stand mixer fitted with the paddle attachment, cream butter, sugar, and brown sugar until light.
  3. Add egg and vanilla and continue to beat until all ingredients are incorporated. 
  4. In a large mixing bowl, whisk together flour, graham cracker crumbs, baking powder, salt, and all spice.
  5. Slowly add dry ingredients to wet ingredient, mixing until incorporated. (I use one of Doodle Bug's small plastic cups as a scoop-- easier to measure out dry ingredients when adding to wet)
  6. Split dough in half-- put 1/2 of dough in refrigerator while layering the bars. This will help the dough slightly cool and will make it easier to spread for the top layer. 
  7.  Spread 1/2 of dough into the greased 8x8 pan. 
  8. Place chocolate bars on top of the cookie dough. I had to trim one of the chocolate bars about 1/4-1/2 inch in order for them to both fit. You want a single layer-- and this layer should be no more and 1/4 inch thick.
  9. Spread marshmallow fluff on top of chocolate bars in a thin and even layer. 
  10. Lightly flour your clean kitchen counter top and take chilled dough out of refrigerator. Use floured rolling pin to help spread out cookie dough. Take pieces of dough and add them (like patchwork) to the top of the marshmallow cream. After all pieces are added you can easily and lightly press down on dough to flatten and make even. 
  11. Bake for 30 minutes until edges are slightly brown.
  12. Let cool completely before cutting. For easier cutting-- I put the cooled dish in the refrigerator for a few minutes to let the cookie bars firm up a bit! These are Ooey Gooey!!
Yield: 16 cookie bars
The finished product! Too  gooey for treat bags!

Saturday, October 6, 2012

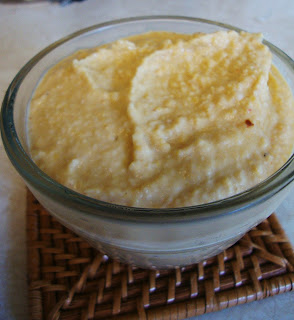
Hungry Hungry Hummus

So, the husband and I were trying to find ways to cut corners and save a little money the next few months and we thought... since we both consume an ungodly amount of hummus each week with lunch and afternoon snacks, why not make our own? 

We have been really great about eating in and shopping the sales since Doodle Bug was born. We've still managed to even take a few trips. I went to Las Vegas with my childhood best friends for a Bachelorette Weekend in March, as a family we went to California for a week in July, and just last weekend I went to Atlanta for another Bachelorette Party. We will be going back up to the ATL later this week for Linsey and Dave's wedding. I have had four friends get engaged in the past year and 1/2! I am loving all the amazing wedding festivities, but my wallet has gone into retirement, and I've only got my change purse to work with for the next few months. What can a girl do where she has another Bachelorette Weekend in February in NYC to save up for?? The answer-- get crafty and thrifty in the kitchen!

We have tried to make our own hummus before, but never really LIKED the way it tasted. A co-worker told me this week that she makes her own and that the key to yummy hummus is Tahini. DUH! Why did we skip this important ingredient in the past?? Probably because we were trying to be suppa thrifty. So, if you are contemplating making your own hummus, Tahini is a MUST BUY. It will run you about $5-$10 depending on the size jar you buy, but it will last through quite a few hummus batches. 


Here's the modified recipe I used (this is a double batch of hummus-- one for me and one for the husband):


Ingredients:

2 15ounce cans of chickpeas
2 Tablespoons olive oil (next time I'm going to try to make with coconut oil-- so good for you!)
4 Tablespoons Tahini paste 
1 teaspoon salt 
pinch ground black pepper
1/4 teaspoon cayenne pepper
1/4 teaspoon paprika
dash of crushed red pepper flakes 
Juice of 1 fresh lemon
1/4 cup water
6 large garlic cloves (back away students!!!)

Directions:
Drain one can of chickpeas and lightly rinse. Pour rinsed chickpeas into food processor. Add second can of chickpeas with the juice. Combine the rest of the ingredients in the food processor and mix until creamy (about 1 minute). While hummus is mixing add 1/2 Tablespoon or more extra olive oil to smooth the consistency.

This made enough hummus for my husband and I for an entire week! Enjoy!


Wednesday, September 26, 2012

Morning Muffies

Little Miss Muffie is now starting to eat more solids due to the fact that in the past 2 1/2 months she has gone from teething zero to teething hell. Seven teeth (including 3 molars) in 10 weeks?? Am I just a naive first time mom, or is this some record of Olympic proportions?? So, if there are copious amounts of misspelled words or grammatical errors included in this post... chalk it up to serious lack of mama sleep. Yes, I know that I am an English teacher, but can't a lady get a night off?? ;)

Doodle Bug became so attached to her daily muffins that I am constantly challenging myself to find yummy new and creative ways to incorporate necessary fruits and veggies in her daily diet via muffies. For a few solid weeks muffies were ALL THE CHILD WOULD EAT! Now, even though she will eat other foods, she still loves to have her morning muffie. 


This week's muffins are inspired by
Keeping Up with the Joneses: Banana Oatmeal Muffins. If you haven't checked out that blog... what are you waiting for... hit it up right now! They seem like such a sweet/nice couple... and they have just had their first child a few days ago! How exciting :)

So, here's what I made for my little bug this week. Hopefully they will keep her satisfied while I am in Atlanta this weekend for a Bachelorette Party! She has mama's milk in the freezer and muffies for a treat!


One Smart Cookie rendition of Banana Oatmeal Muffins 
Lil Miss Muffie's Morning Muffie

Ingredients:


2-1/2 cups old fashioned rolled oats (not the quick cooking)

1 cup Greek yogurt
2 ripe bananas (speckled)
2 eggs
1/3 cup applesauce (I make my own, but you could easily use the prepackaged applesauce cups) This replaces the oil in the baking... yummier and healthier for Miss Muffie
3/4 cups packed brown sugar
1 teaspoon vanilla extract
1/2 teaspoon baking soda
1-1/2 teaspoon baking powder
pinch salt

Directions:
  1.  In a food processor or blender, grind up the oats... make a "flour" consistency... it will be a little lumpy. Set aside.
  2. Preheat oven to 350.
  3. In a stand mixer, beat together the brown sugar and applesauce. 
  4. Add eggs one at a time, mixing well after each addition.
  5. Add vanilla extract.
  6. In a small mixing bowl, smash bananas and stir together with Greek Yogurt. 
  7. In a medium mixing bowl whisk together oat "flour", salt, baking soda, and baking powder.
  8. Add oat mixture alternately with banana mixture to egg mixture a little bit at a time. Beat between each addition. 
  9. Spray muffin tins with non stick spray and use a large cookie scoop to fill each 3/4 full. 
  10. Cook for 20-25 minutes or until inserted tooth pick comes out clean.
Yield: about 16-17 large muffins- think perfectly baked single serving of your morning banana/brown sugar oatmeal.  This recipe tastes more like a bowl of oatmeal than a muffin.

Sunday, September 23, 2012

Chewy Brownie Cookies

Bakery Club students were in a deadlock on Friday... cookies or brownies? 

At first I thought I would make a cookie cake, but then I realized... what would a cookie cake have to offer to the students wanting brownies? Okay, scratch cookie cake idea...what about brownie bites? Not quite the sweet treat the cookie students would be hoping for either.  This realization then lead me to google "brownie cookies" (while simultaneously crossing my fingers and hoping such a thing would already be in existence). Luckily, and to my delight, the Brown Eyed Baker had already taken this plunge into the big brownie or cookie debate. 


I followed her recipe, and my husband (quite the chocolate expert) approved...and approved...and (just for good measure) approved the recipe one last time. 


So, in case you get the hankerin' for a chewy brownie with a crunchy outer shell, give this recipe a GO!

Ingredients:


16 ounces bittersweet chocolate (I bought 4 Ghirardelli 4oz bittersweet chocolate baking bars)

4 Tablespoons unsalted butter (softened)
4 eggs
1-1/3 cups granulated sugar
1 teaspoon vanilla extract
1/2 cup all-purpose flour
1/2 teaspoon baking powder
1 cup semisweet chocolate chunks (that ooey gooey center)

Directions:

  1. Chop up 16 ounces bittersweet chocolate. Put butter and chopped chocolate into a heat proof bowl and double broil over simmering water. If you don't have a double broiler--I use a large soup pot and fill with about 2 inches of water. I let it come to a simmer. I put the ingredients that need to melt in a smaller pot (or any heat proof bowl). I hold the smaller bowl/pot over the simmering water and stir ingredients until completely incorporated and mixture is smooth. Put melted chocolate mixture to the side and allow it to come to room temperature. 
  2. Preheat oven to 350 and line baking sheets with parchment paper (wait until chocolate mixture is cooled)
  3. Whisk together eggs, vanilla, and sugar in a medium size mixing bowl.
  4. In a small mixing bowl, sift together flour and baking powder.
  5. Add the cooled chocolate mixture to the eggs, vanilla, and sugar mixture. Stir well to combine. 
  6. Slowly add the dry ingredients, FOLDING them into the batter. 
  7. Once the flour mixture is incorporated, add the chocolate chunks.
  8. I have a large cookie scoop, so I filled the scoop about 3/4 full for each cookie. Cookies will spread just a little, so make sure you don't place them too close together on the prepared sheets. 
  9. Bake for 10-11 minutes or until firm on the outside. DON'T over bake. Cool on baking sheets or transfer to wire cooling racks after a few minutes if you need to reuse baking sheets. 
Yield: about 28 ooey gooey brownie cookies 

**TIP- do NOT put batter into fridge in between batches. My second batch of cookies came out a little lumpy... husband says they still taste just as good, but aren't as nice looking as the first batch. 

Cookie on the right is from the first batch, and the cookie on the left is from the second batch (cooled batter). It also took about a minute longer to bake the second batch.


Friday, September 21, 2012

Bakery Club

The first few months, being a homeroom teacher to a 6th grade class is more about being their "mother" than their teacher. They are overwhelmed by the homework, the number of teachers and each teacher's particular teaching style, locker changes, folders, schedules, planner, etc. They have never had lockers before, and organization... psh, they have no idea what that word means!

Kids like sweet and yummy homemade treats, so this year I decided to start a Bakery Club in my homeroom class.  Every few weeks I check their planners to make sure they have all their assignments, projects, tests, and quizzes written down for the week, and if they do.... they get to decide which treat they would like for me to make. 

Last Bakery Club (2 weeks ago) I made
The Tender Crumb's Chocolate Chip Cookies. The kids thought they were pretty good (they liked the amount of chocolate), but they thought they were a bit tough. That's the best part about teacher 11 year old kids- they are BLATANTLY honest. Great group to test out new recipes on! 

This time 11 out of the 24 kids in school today were able to achieve Bakery Club status. One student is lactose intolerant (and also many other allergies), so I had him tell me one of his favorite snacks that I can get from the store. The other 10 students were in a deadlock on choice of sweet. Five students wanted brownies, and five students wanted more chocolate chip cookies (but chewier)! 


So, being the tie-breaker, I chose
Brown Eyed Baker's Better than Brownies Chocolate Chip Cookies. Hopefully they will turn out well for the kids! I'll keep you posted...

Tuesday, September 18, 2012

A Baker's Wishlist

I have been blessed to have quite a stocked kitchen full of cooking and baking necessities (most of which were amazing wedding gifts and shower gifts), but there's still a few items that I WANT. Need, well no not really, but desire all the same. 

I have never been one to want for much. I buy what I need and am satisfied. I don't like clutter, and material possessions always end up piling up and creating more clutter. I have become baking obsessed here in the past few years, so I find that anytime a birthday or holiday is coming around I always ask for a random kitchen accessory. What did I ask my Husband to get me for Mother's Day? A food scale for making macarons :)

Here's my updated baker's wishlist: 

  1. I'll start with more prep space, but that's really not an option when considering the square footage of our home. Would I be happy with a kitchen that takes up half of the square footage? Yes, but would I be able to one day resell this home to someone else who is as baking obsessed as me? Most likely the answer is no.  
  2.  More kitchen aid mixing bowls. Glass, stainless, with handles and without, with lids. Oh man!   
  3. A fun color stand mixer. I have white, which is classic and beautiful, but I would love something random, flashy, and different as well. My older sister just bought a beautiful black one that sparkles... SPARKLES!  
  4. A copper bowl for making meringues and French Macarons. I had NO idea just how expensive they were until the other day!  
  5. Cookie cutters for all occasions. Currently I have letters of the alphabet, star, sun, and circles.
  6. Medium and small cookie and batter scoops. 
  7. More 9 inch round pans 
  8. A pie plate-- one thing I have yet to attempt 
  9. Pastry tips for icing cakes  
  10. Large angled spatula for icing cakes 
  11. All different types of fun decorative accents and sprinkles for cupcakes. 
  12. One more muffin pan-- would make Doodle Bug's meal preps so much easier.   
  13. New cookie sheets-- mine are so old, and have been used so often that they are not "dark," they are BLACK!
  14. My own store front... I mean... a girl can DREAM, can't she?
  15. And last, but certainly not least... an apron that isn't decorated for Christmas. Let's just say it's Christmas all year round when I'm in the kitchen.

Monday, September 17, 2012

Rainbow 1st Birthday Party

Doodle Bug turned O-N-E on July 7th, and we had a wonderful birthday party with friends, family, and copious amounts of dessert. 


I made a rainbow layer cake (inspired by Whisk Kid), tie dye cupcakes, funfetti cake pops, and a rainbow smash cake for the birthday girl. 


For these creations I did not make everything from scratch. I knew I had quite the task at hand, so I started about a month before her birthday. I used box white cake mixes for the cupcakes and layer cakes, and funfetti mixes for the cake pops. 


For the large layer cake: I used two boxes of white cake mix and just used the egg whites (in order to keep the color white).

Then I separated the mix into 6 bowls and used food coloring to tint the cake batter to the correct shades of red, orange, yellow, green, blue, and purple. Helpful hint: If you use gel food coloring the colors will be much more vibrant. 

After the layers completely cooled, I wrapped them in cling wrap and stored them in freezer bags (3 in each bag) in my deep freezer. The day of party I took them out of the freezer and let them thaw, and then I iced them with a lemon buttercream. I decorated them with Spritz Birthday Candles from Target.

I greased and floured 9 inch round pans, and then baked at 350 for about 20 minutes or until a toothpick inserted in the center came out clean.

For the small smash cake: I used one white cake mix and 6 inch rounds. I iced this cake with Martha Stewart's Basic Vanilla Buttercream
Her recipe makes a TON of buttercream! I made the whole recipe (without the vanilla) and then split it in 1/2. One 1/2 I flavored with vanilla, and used to ice the smash cake and cupcakes. The other 1/2 I flavored with fresh lemon juice and zest and iced the large layer cake. 

I piped the top of the smash cake with an extra large closed star pastry tip. I used this tip to ice the cupcakes, as well as an extra large open star tip.


For the Tie Dye Cupcakes: I used one box white cake mix with egg whites. I separated the mixture into 6 bowls and used food coloring to tint the cake batter to the correct colors. 

I lined my muffin tin with cupcake liners, and started to fill them one color at a time. I started with purple and ended with red. Spoon an equal amount of each color into the tins piling the colors on top of each other. Use 6 different spoons so you do not mix colors. After all cake batter is equally divided, take a clean tooth pick and swirl the colors (DON'T over mix). Wipe tooth pick clean between each use.  Follow baking directions for the mix used. Makes 24 cupcakes. 

I bought the rainbow toppers from Target  (Spritz brand) and then decorated with name, date, ONE, etc. 
For the Cake Pops: I made a funfetti cake mix using the directions on the box. I baked the cake in 9 inch rounds. After the cakes cooled I crumbled them into my stand mixer and turned the cake into crumbs. I added a small amount of lemon buttercream (same recipe as above). I rolled cake balls and froze them on a baking sheet lined with wax paper. When the cake balls hardened i transferred them into freezer bags until the day before the party.  used white and pink candy melts to dip them in, and various sugars and sprinkles to decorate them. 

To display them I used small cupcake liners. 


For Decorations: I bought card stock paper in all shades of the rainbow and printed out a picture of Doodle Bug from each month. I used mod podge to secure the picture to the card stock. I labeled each month with the month and year. I used a hole punch and upcycled ribbon from a Christmas gift to string the pennant. 

I also bought the Spritz Party Banner from Target and decorated it myself with her name. 


The Spritz Striped Party Hats were a hit, too.


All in all, even though it was a busy June and July full of planning, everyone had a wonderful time... especially the birthday girl herself!

Exhausted from a full day of swimming, eating, cake gorging, and present opening... we headed home... greeted by a full rainbow. 

RAINBOW 1st Birthday Party= Success!